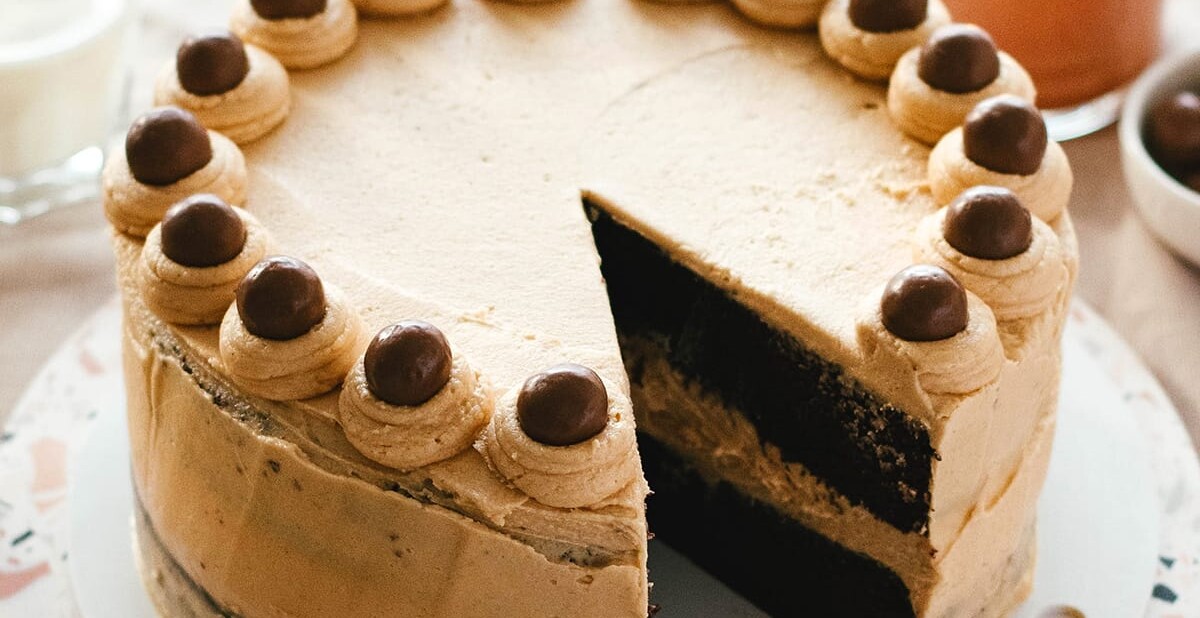
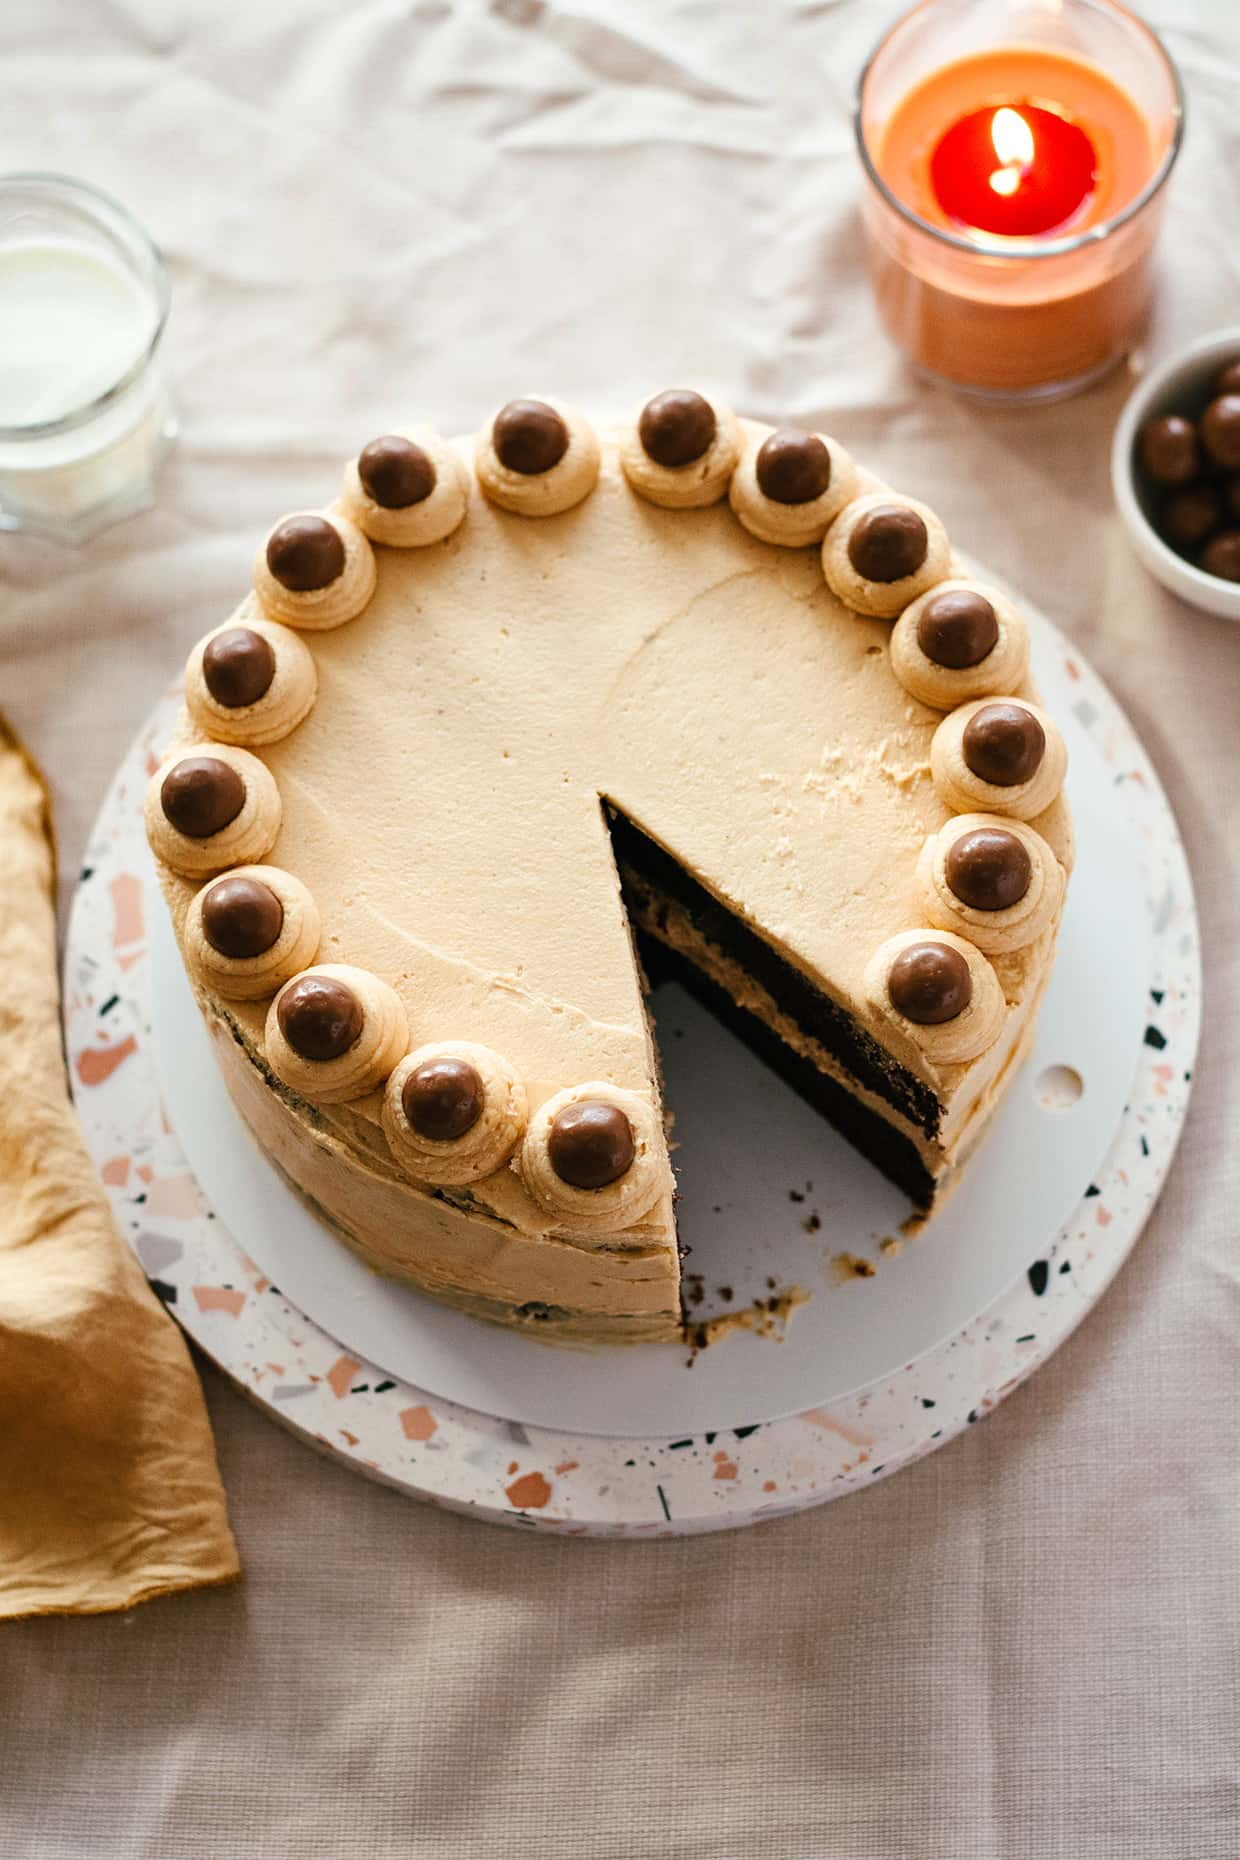
Perfect for any occasion, this rich chocolate peanut butter cake is a thing of dreams. The soft cake is deeply chocolaty and generously filled with a sweet peanut butter frosting. It will make you think you’re eating a giant peanut butter cup. The two layer cake is simple to put together and keeps perfect for days.
I can argue about cakes all day long, mainly with myself, because I like everything and anything, but I’m never in the mood for just anything. Confusing, I know. But if there’s one thing or one flavor combination that triumphs over everything, it’s chocolate and peanut butter. It’s such a stand-out yet familiar combination, I can’t possibly say no to it. So here I am with this rich chocolate peanut butter cake.
I’m sure you’ve heard of or seen plenty of these and I am adding one more. Because why not? It’s the one cake I think we can all agree on, the one I know I am always in the mood for.
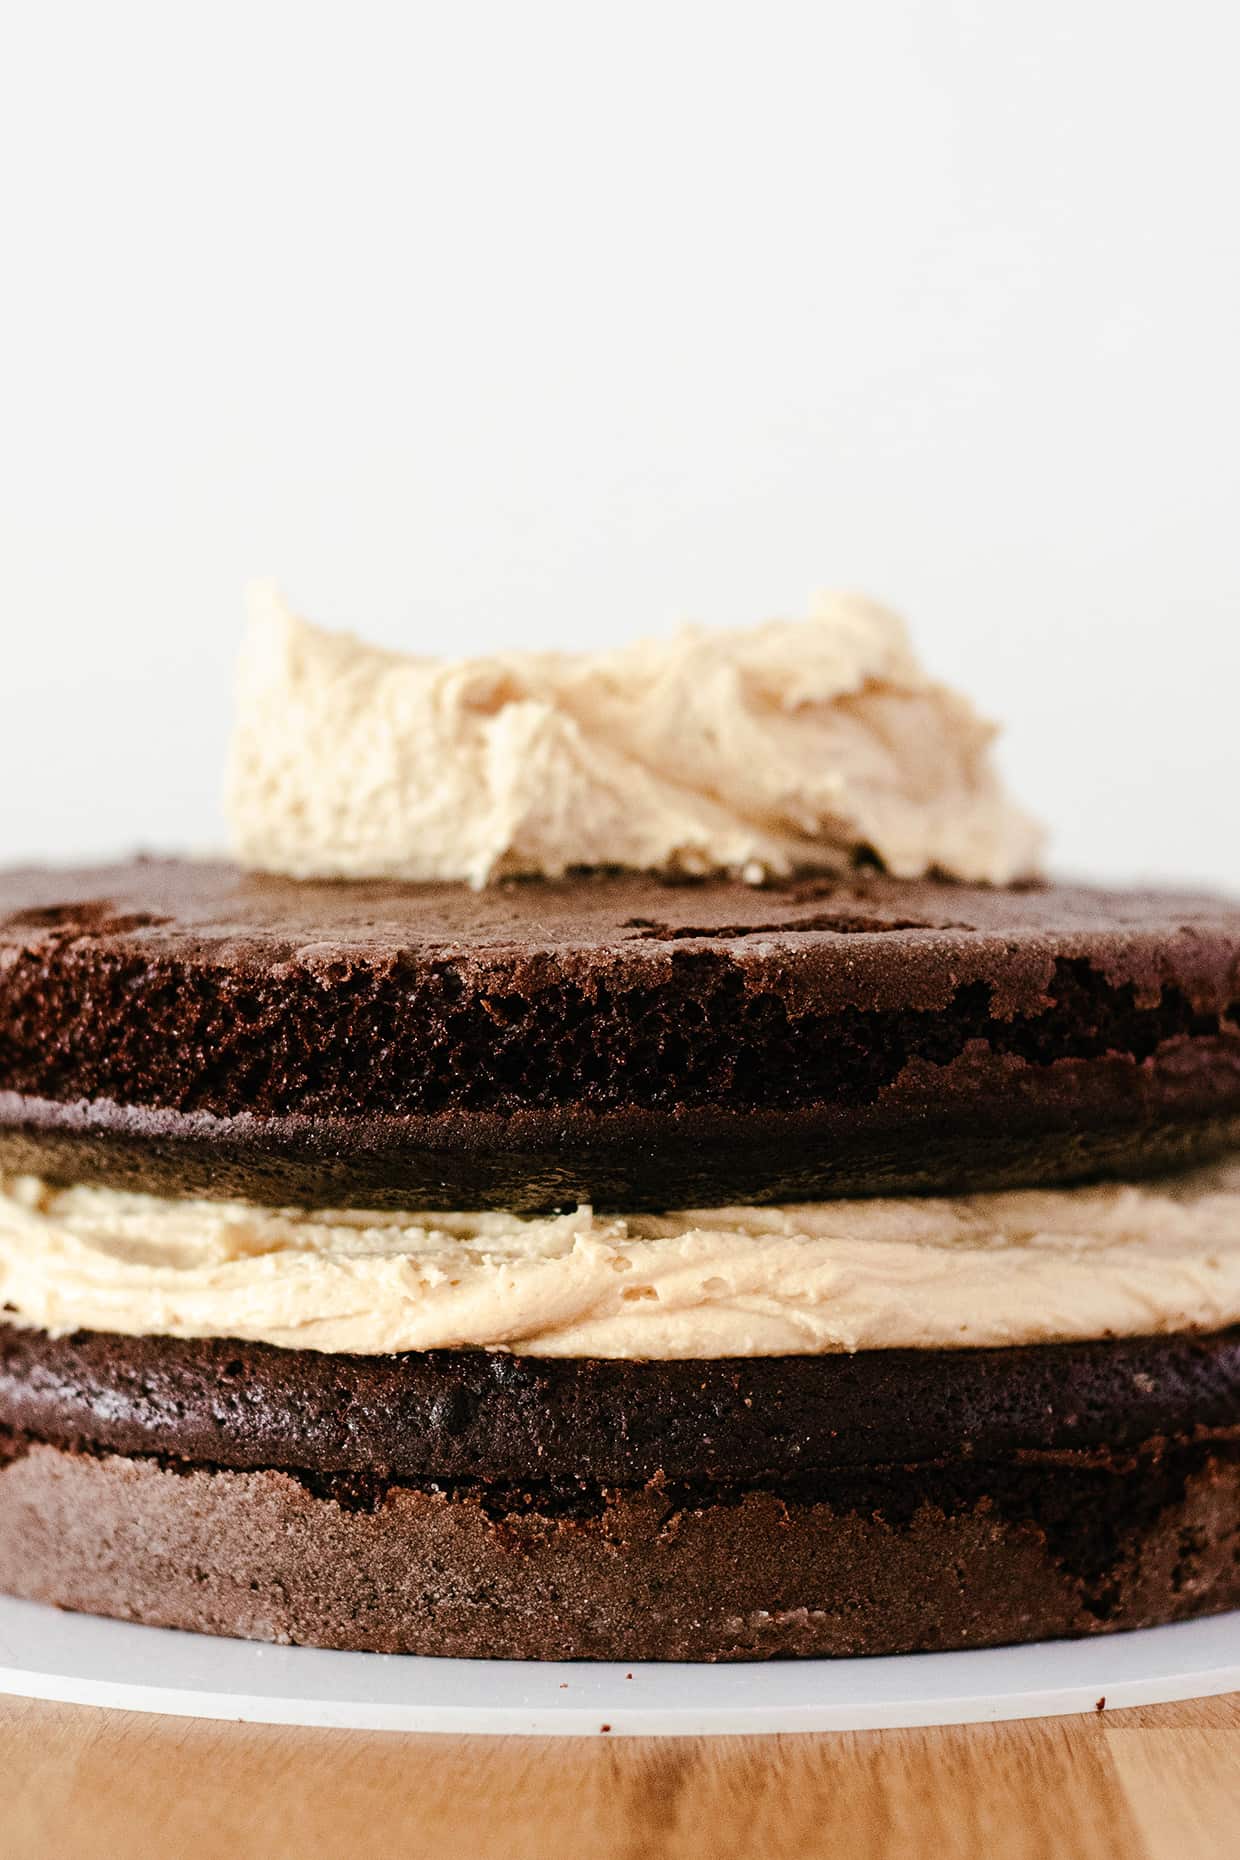
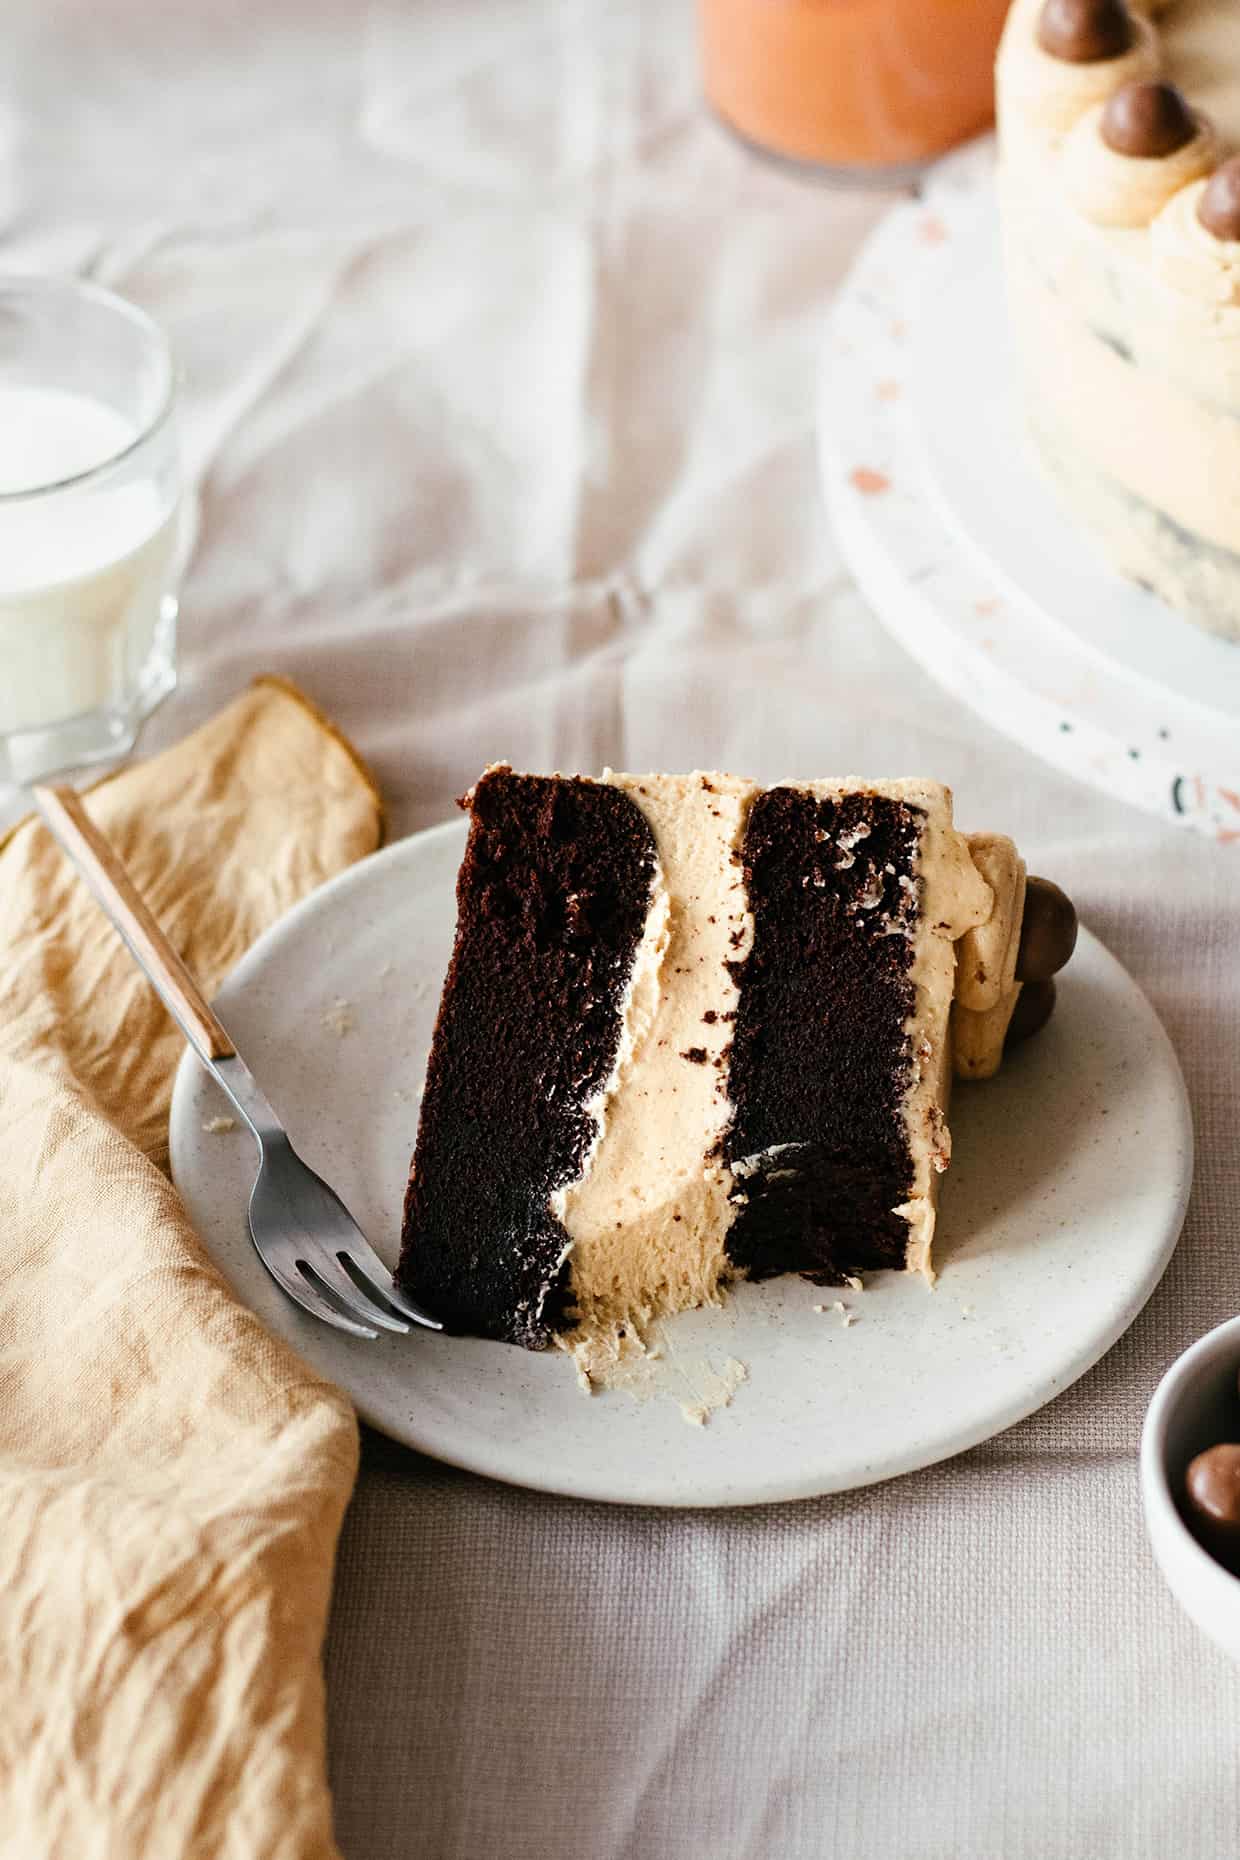
This chocolate peanut butter cake is a 2 layer cake. It could be transformed into a 3 or 4 layer cake, but I find two-layer cakes to be so satisfying to make. Just two halves that you glue together, no over-thinking.
The base: Rich chocolate cake
This is a soft and super chocolatey cake. The cake layers will feel a bit heavy, especially right after baking and you need to handle them with care, so they don’t break. It’s because they’re soft, on the denser side and moist, for lack of a better word.
The key to that rich flavor is a mix of unsweetened cocoa powder and unsweetened coffee. The first gives you a deep chocolate flavor and color, while the coffee makes it even more prominent.
What is Dutch-processed cocoa powder?
Also called alkalized or European-style cocoa powder, this is cocoa powder that is washed with a potassium carbonate solution that neutralizes cocoa’s acidity to a pH of 7. It has a darker, deep brown hue, compared to natural cocoa powder which is lighter, more orange hued.
Dutch processed powder has an earthier flavor and can give you that rich, fudge-like texture in cakes (in combination with other ingredients). I really like it for the color too.
If you want to keep on reading about all the different cocoa types and the differences, this King Arthur baking post is perfect.
Adding coffee to chocolate cake
Coffee complements the cocoa, making the chocolate flavor of the cake better, deeper, richer. Trust me that you can’t taste it at all, even though I’m using one whole cup of coffee.
Think of this like making a soup or sauce, one just with vegetables and water and the other with vegetables and stock. The latter will have a much more developed flavor and that is what coffee does in this recipe.
If you don’t like the idea of strong coffee or simply don’t have it on hand, you can use instant espresso powder. Just dilute it in a cup of hot water, along with the sweet cocoa.
If you don’t have espresso powder either, use plain hot water and hot cocoa mix instead.
Using hot cocoa powder in cake
As if coffee and cocoa powder aren’t enough (they probably are), I like to add some hot cocoa powder too. I first tried it to make this cake more candy-like and it just stuck. I’m only using a tablespoon, but it adds that extra hint of chocolate flavor and I really think the cake is better with it.
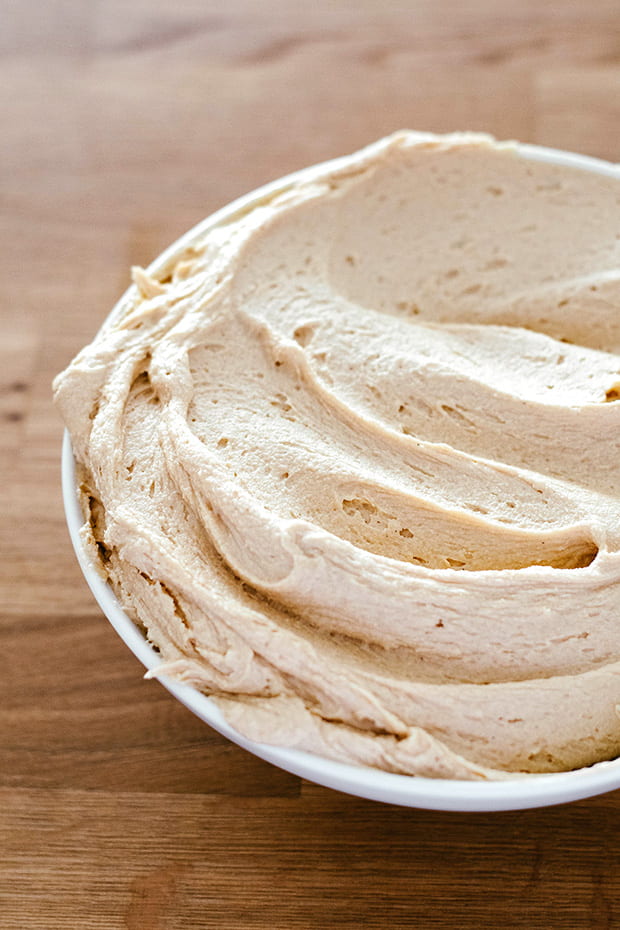
The filling: peanut butter frosting
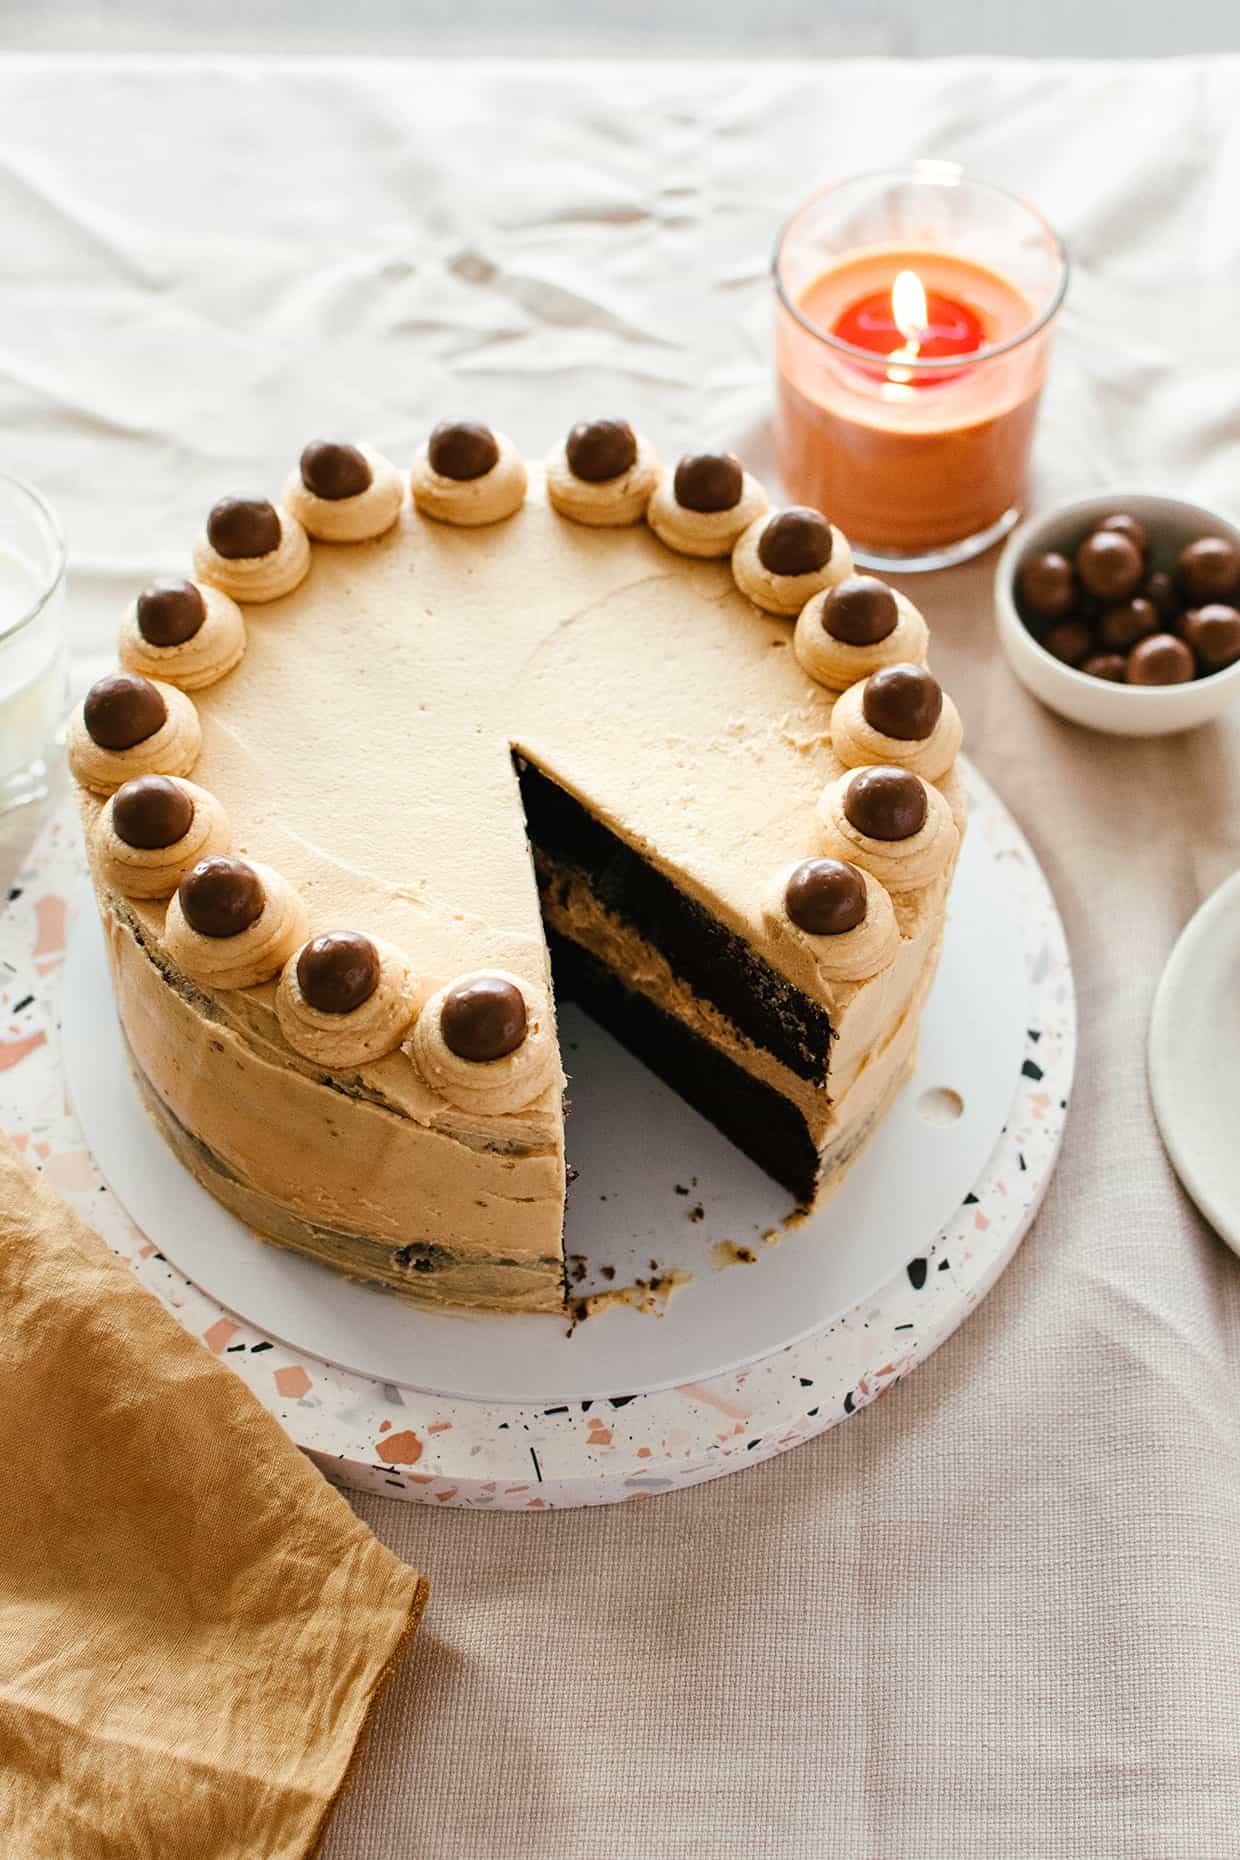
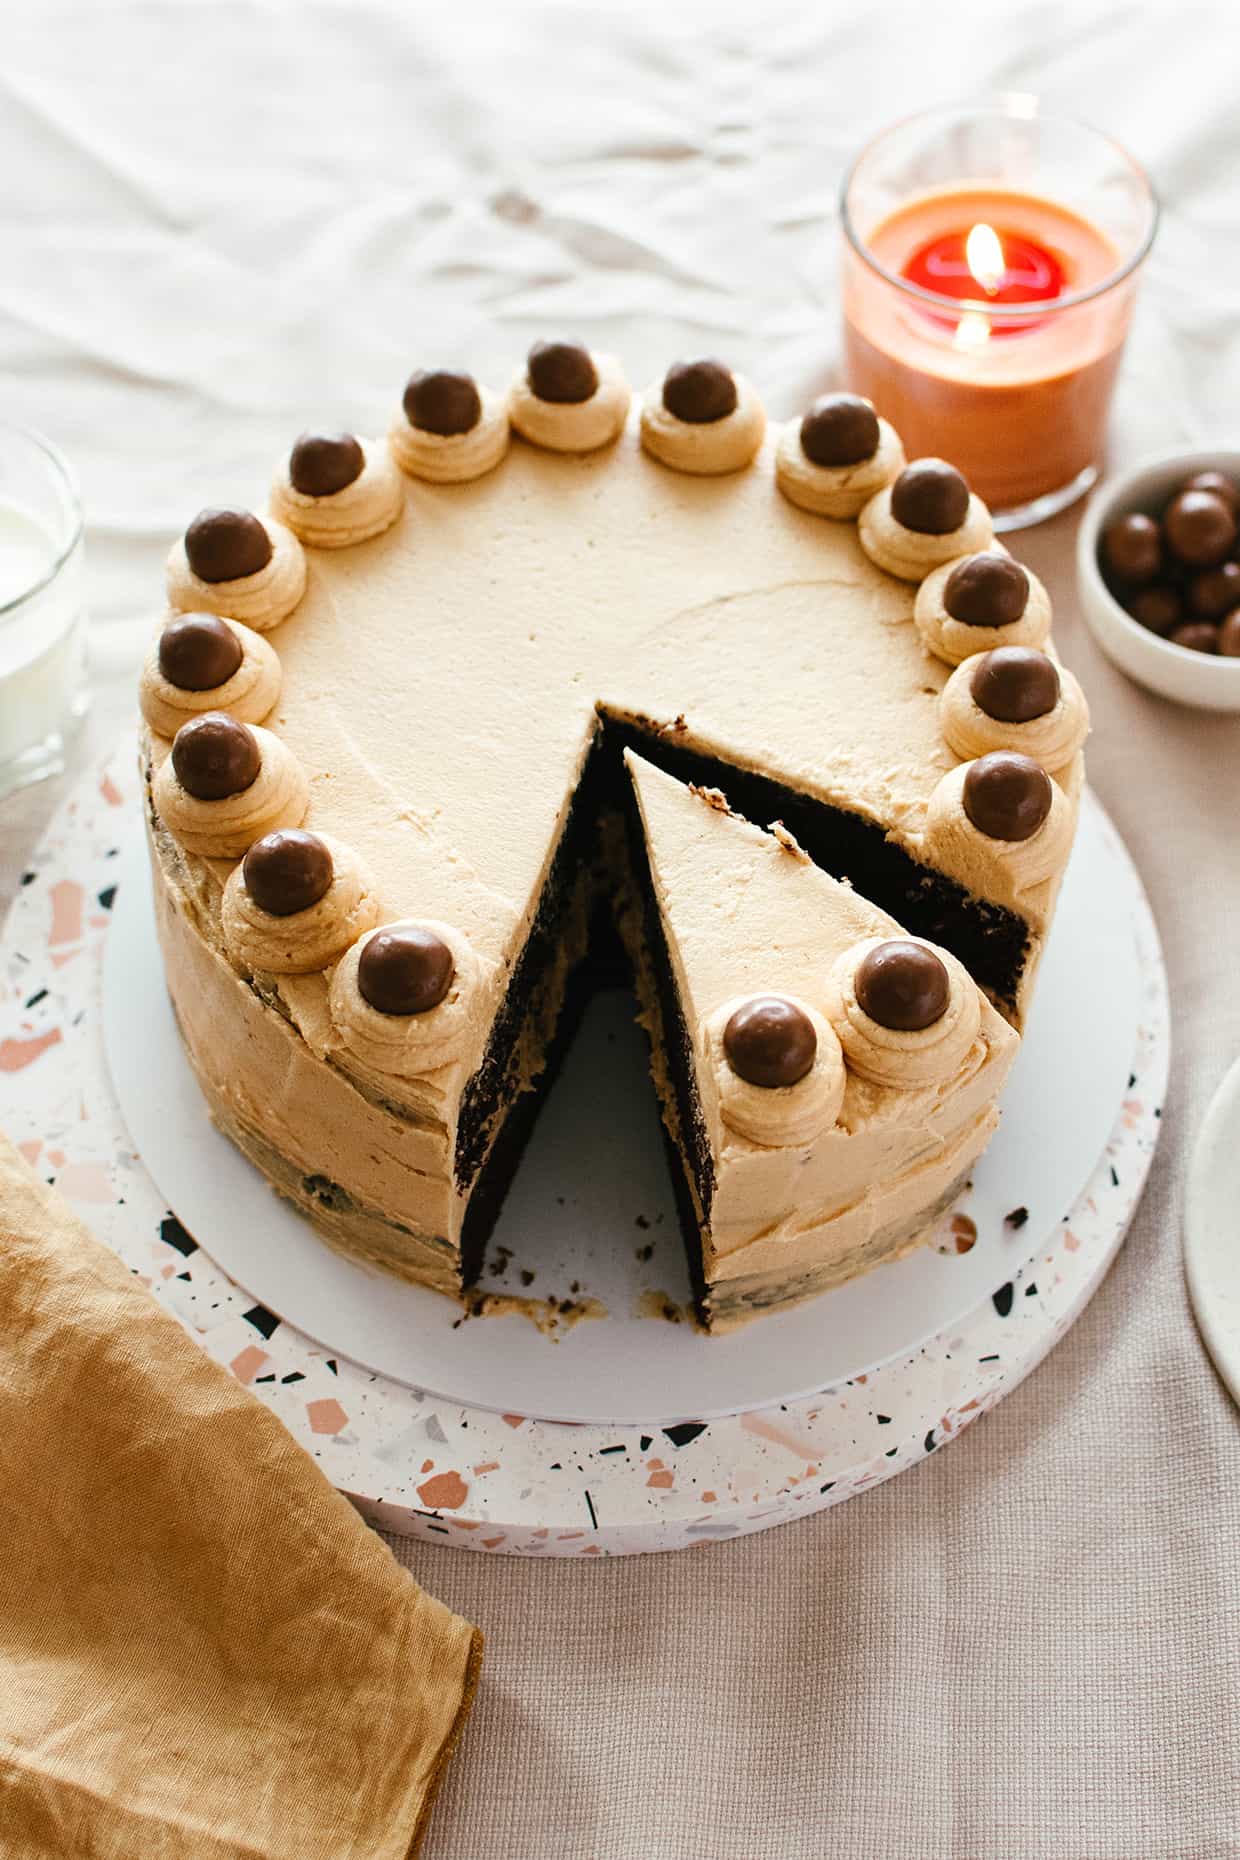
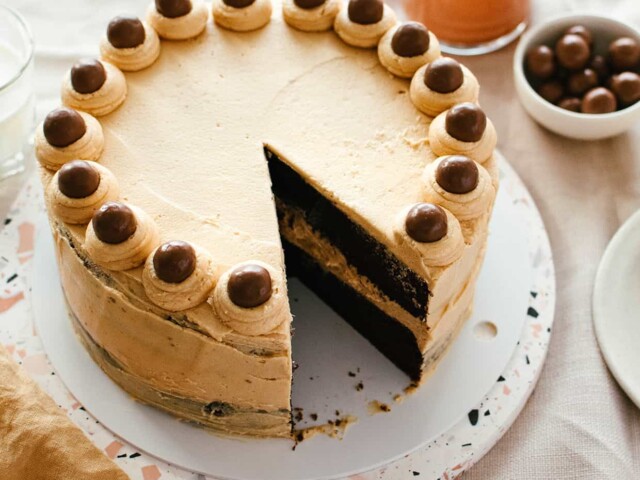
I could eat this thing by the spoonful! Actually, I always do, it’s so tasty. This recipe makes plenty of frosting. Enough to make a fully covered, smooth cake. You can notice from the photos that I made a semi-naked cake, which resulted in some leftover frosting (that of course didn’t go to waste).
This is a very simple 3-ingredient frosting. Or a 4-ingredient one, if you count the vanilla. It’s made simply by beating butter (unsalted European butter) with peanut butter, then gradually whisking in powdered sugar until the frosting is stiff but still spreadable. Always keep in mind that it stiffens even more once the cake is in the refrigerator.

Best type of peanut butter
I am using a commercial creamy (or smooth) peanut butter. It’s the kind that’s made with a bit of salt and sugar already. Usually it also contains a small percentage of neutral oil. I find that this is the best type of peanut butter for desserts (like these cookies) as it holds up really nicely. Frosting made with this stays intact for days.
If you want to, you can try making the frosting with completely natural peanut butter, but you might have to adjust the amount of sugar used. And don’t forget to add a pinch of salt, if it’s salt-free originally.
A few tips on assembly
Your cake layers need to be completely cooled before you add frosting. You can bake them ahead of time, wrap in plastic wrap once they’ve come to room temperature and store in the refrigerator overnight.
You can use frosting right after you make it. To make a prettier or non-naked cake, frost the cake once, to make a crumb layer. Then chill the cake for 15-30 minutes and add a second layer of frosting to make it super smooth.
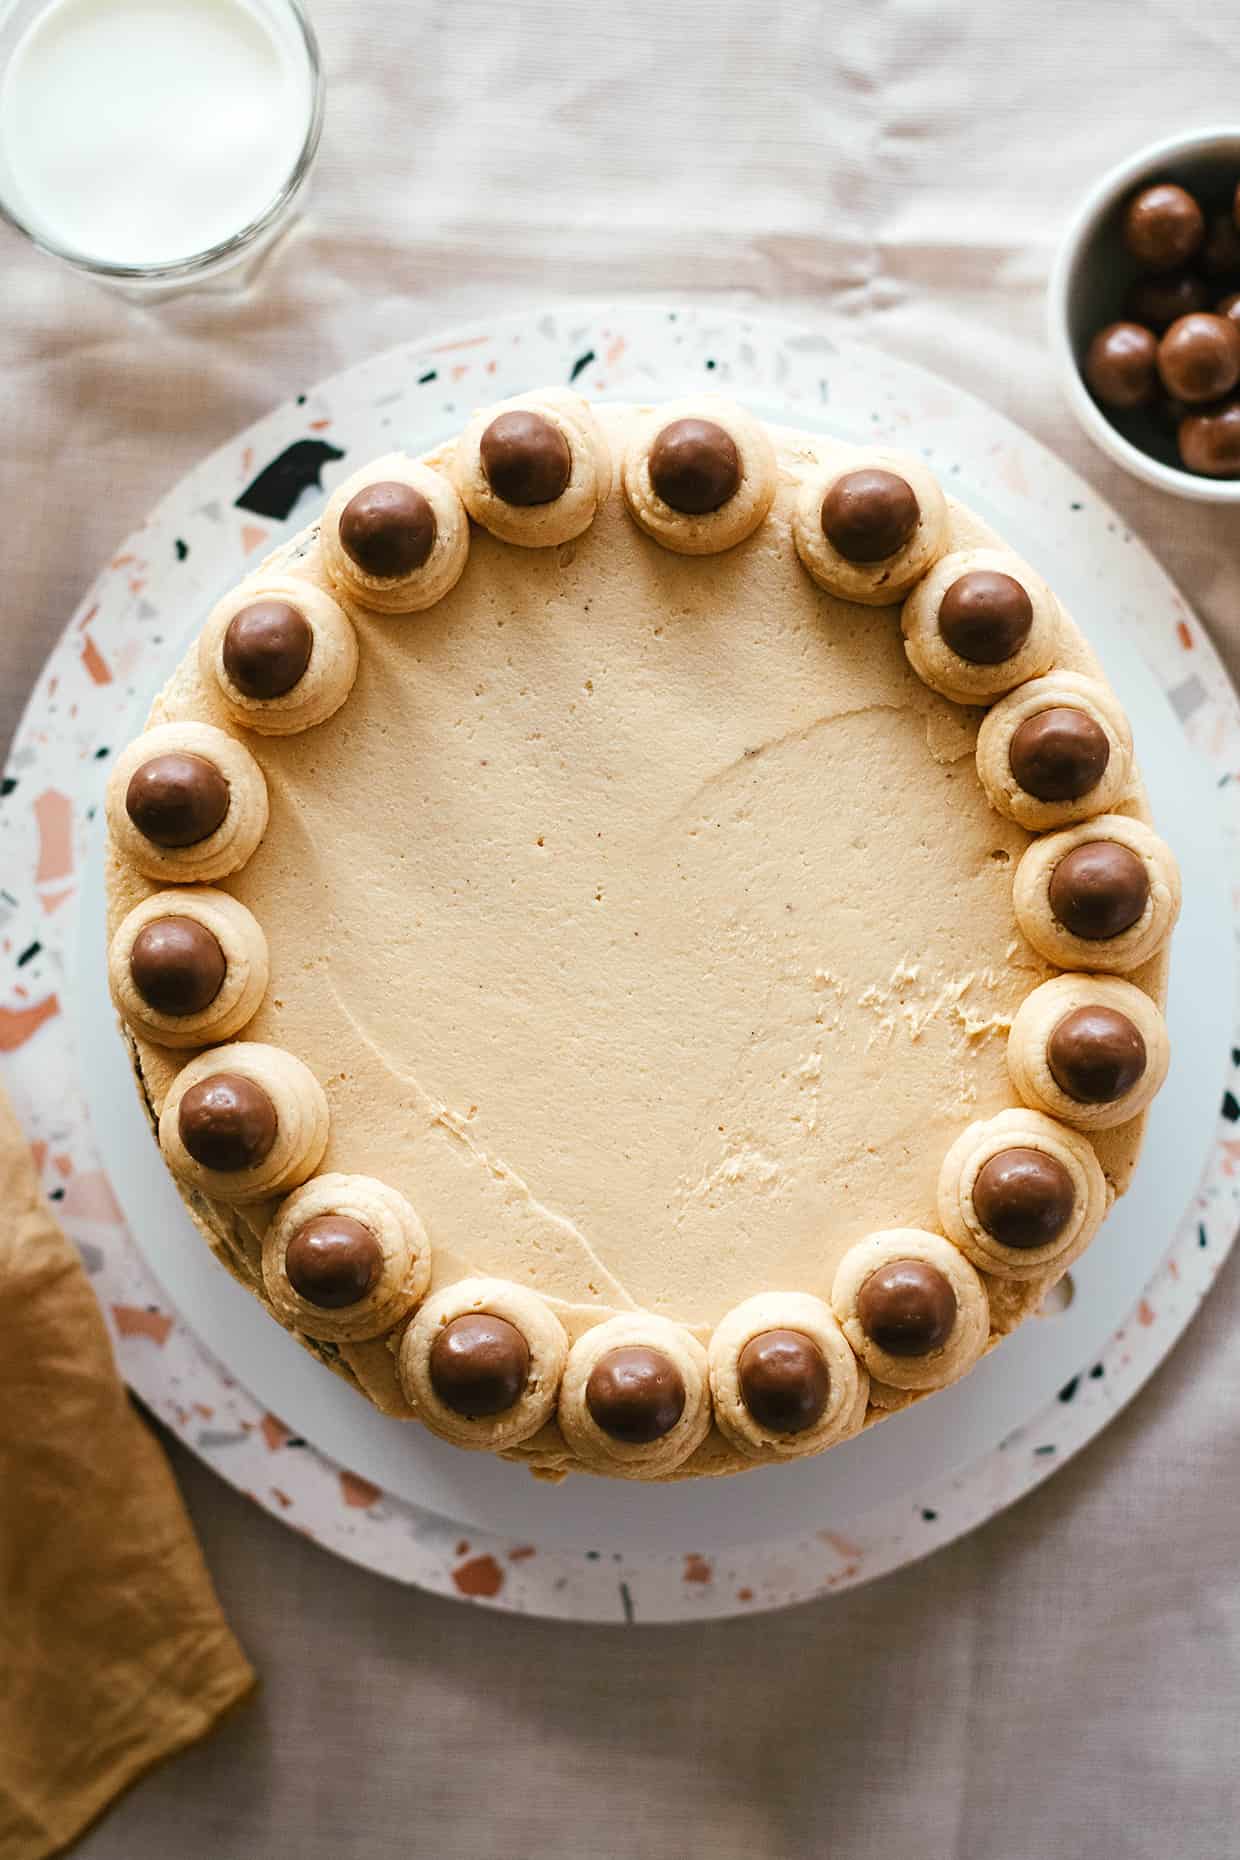
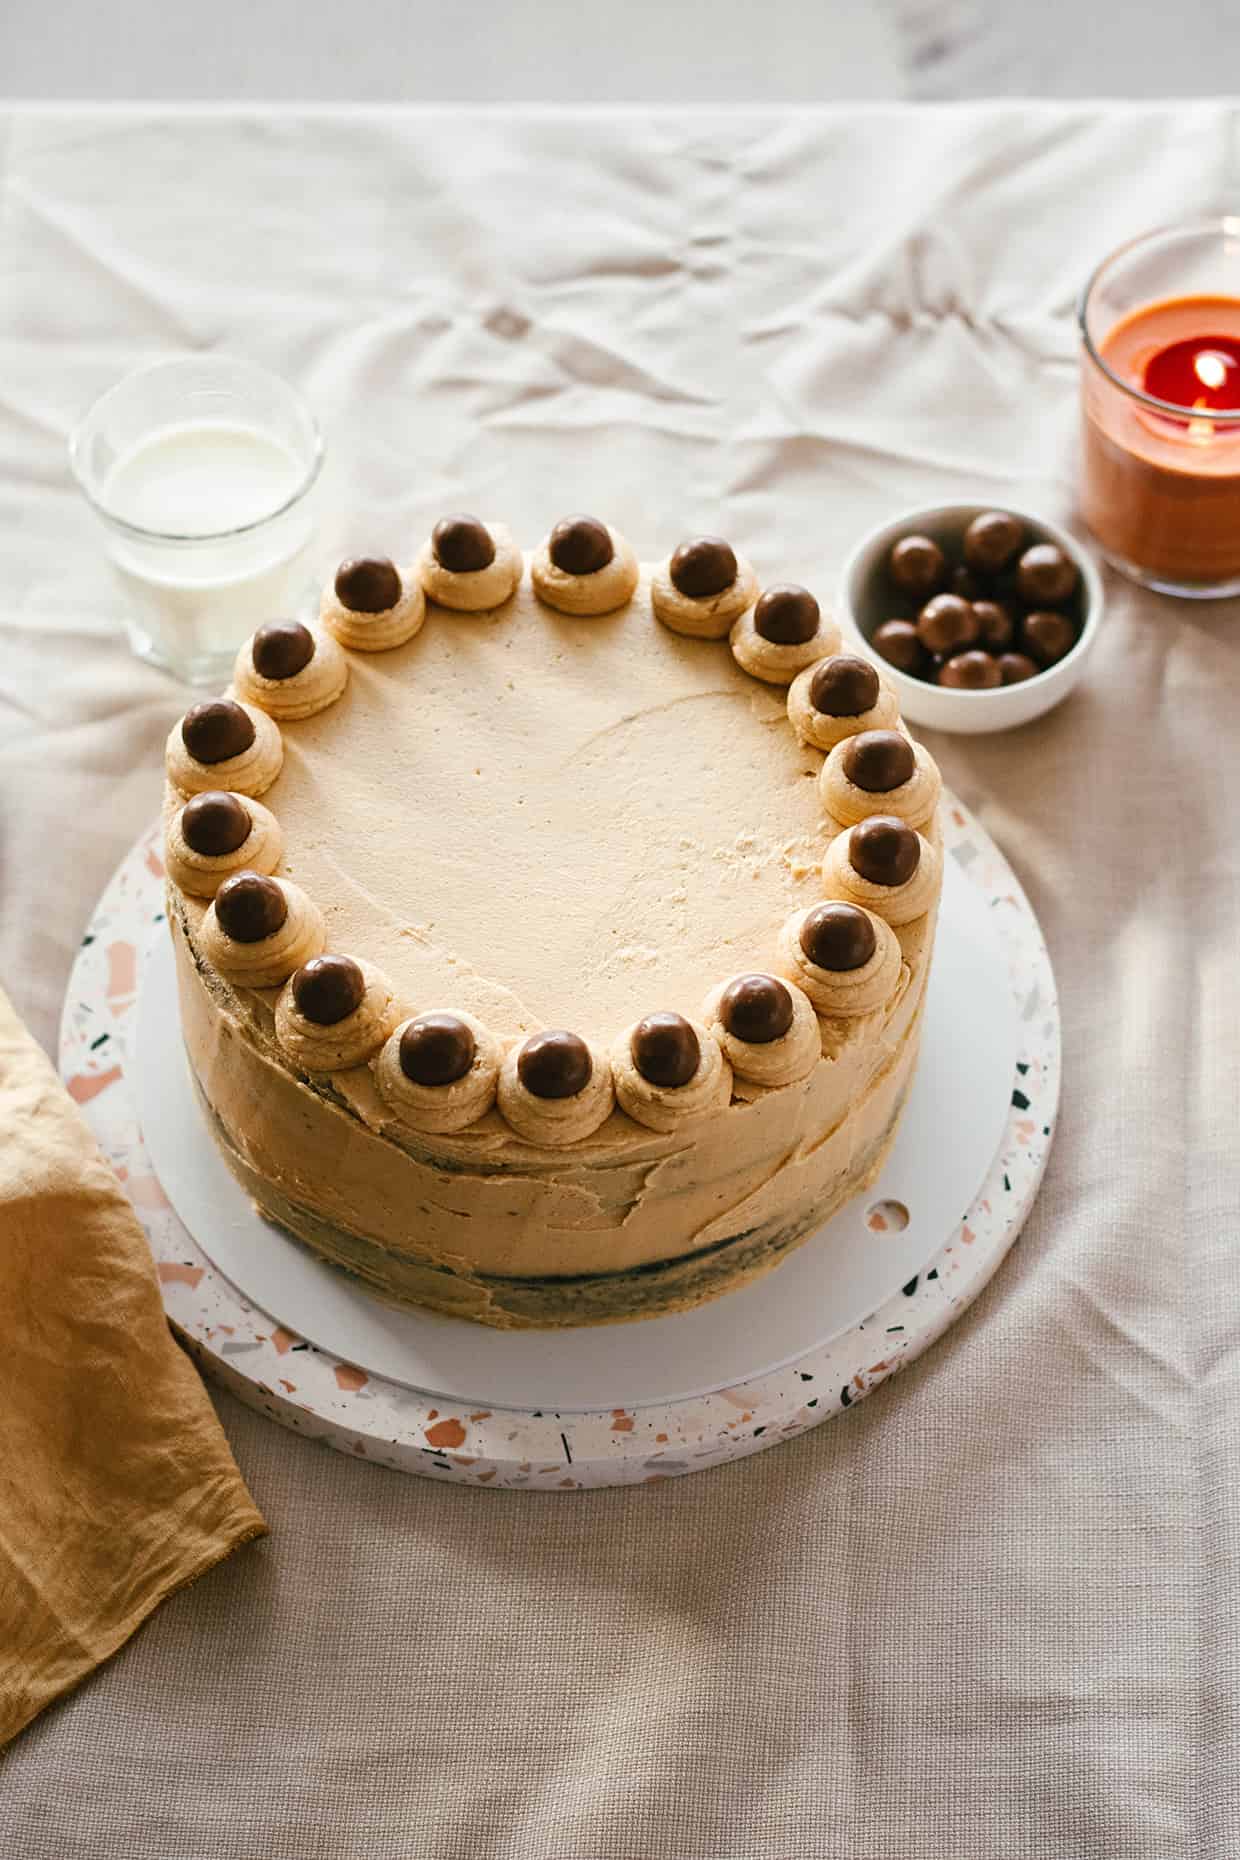
Add any decorations right after you add the frosting. I’m using malt chocolate balls, but you can easily use chocolate covered nuts, peanut butter cups, chocolate or regular sprinkles. Anything you like.
In any case you need to add these decorations to freshly piped frosting, so they can stick. Once the cake is completely chilled, the frosting hardens and you can’t add anything to it (apart from a chocolate glaze).
Cutting and serving cake
Always allow the cake to rest at room temperature for 20-30 minutes (even up to 1 hour) before serving. This allows the frosting to soften, so that it’s not hard as you eat the cake. Creamy frosting make the whole cake-eating experience much more enjoyable.
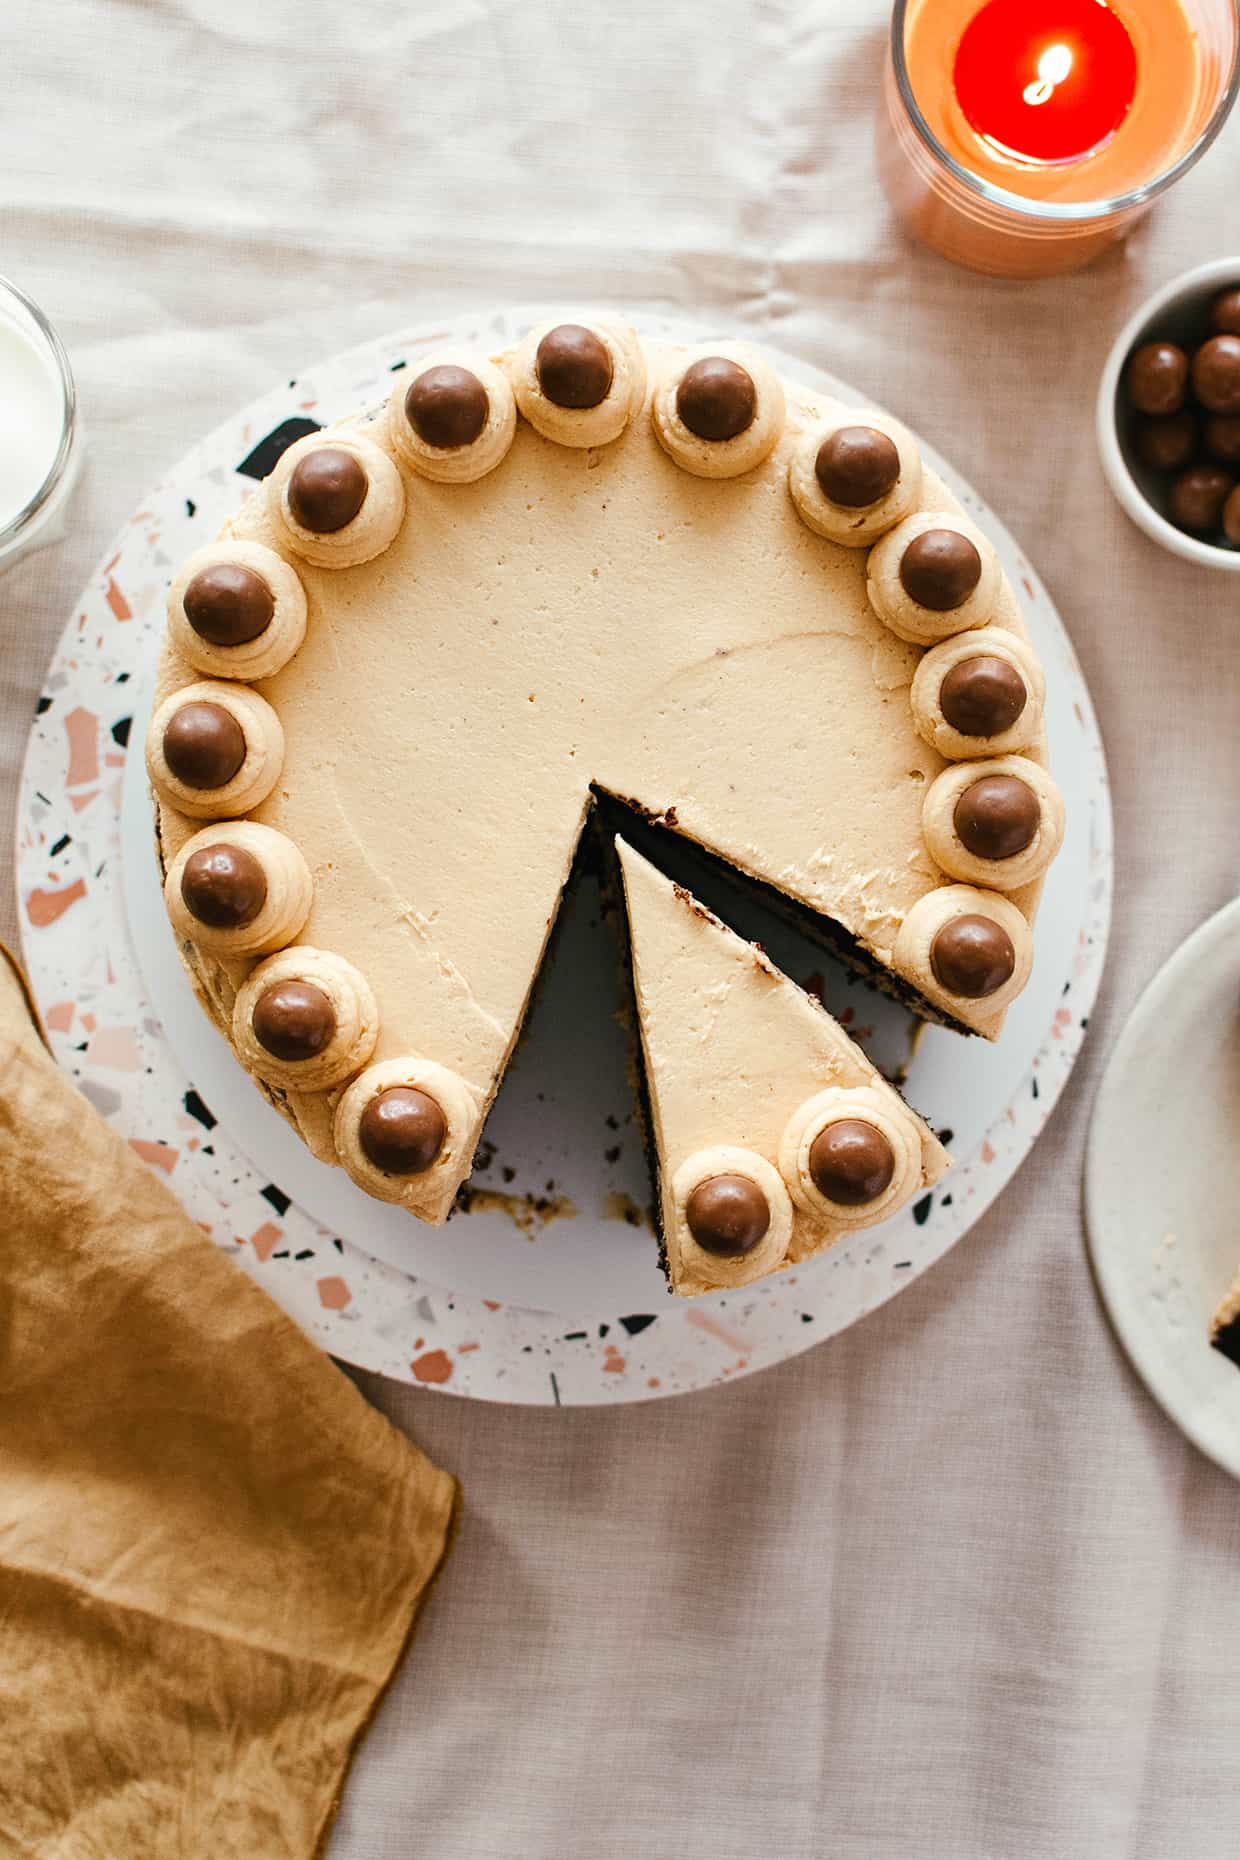
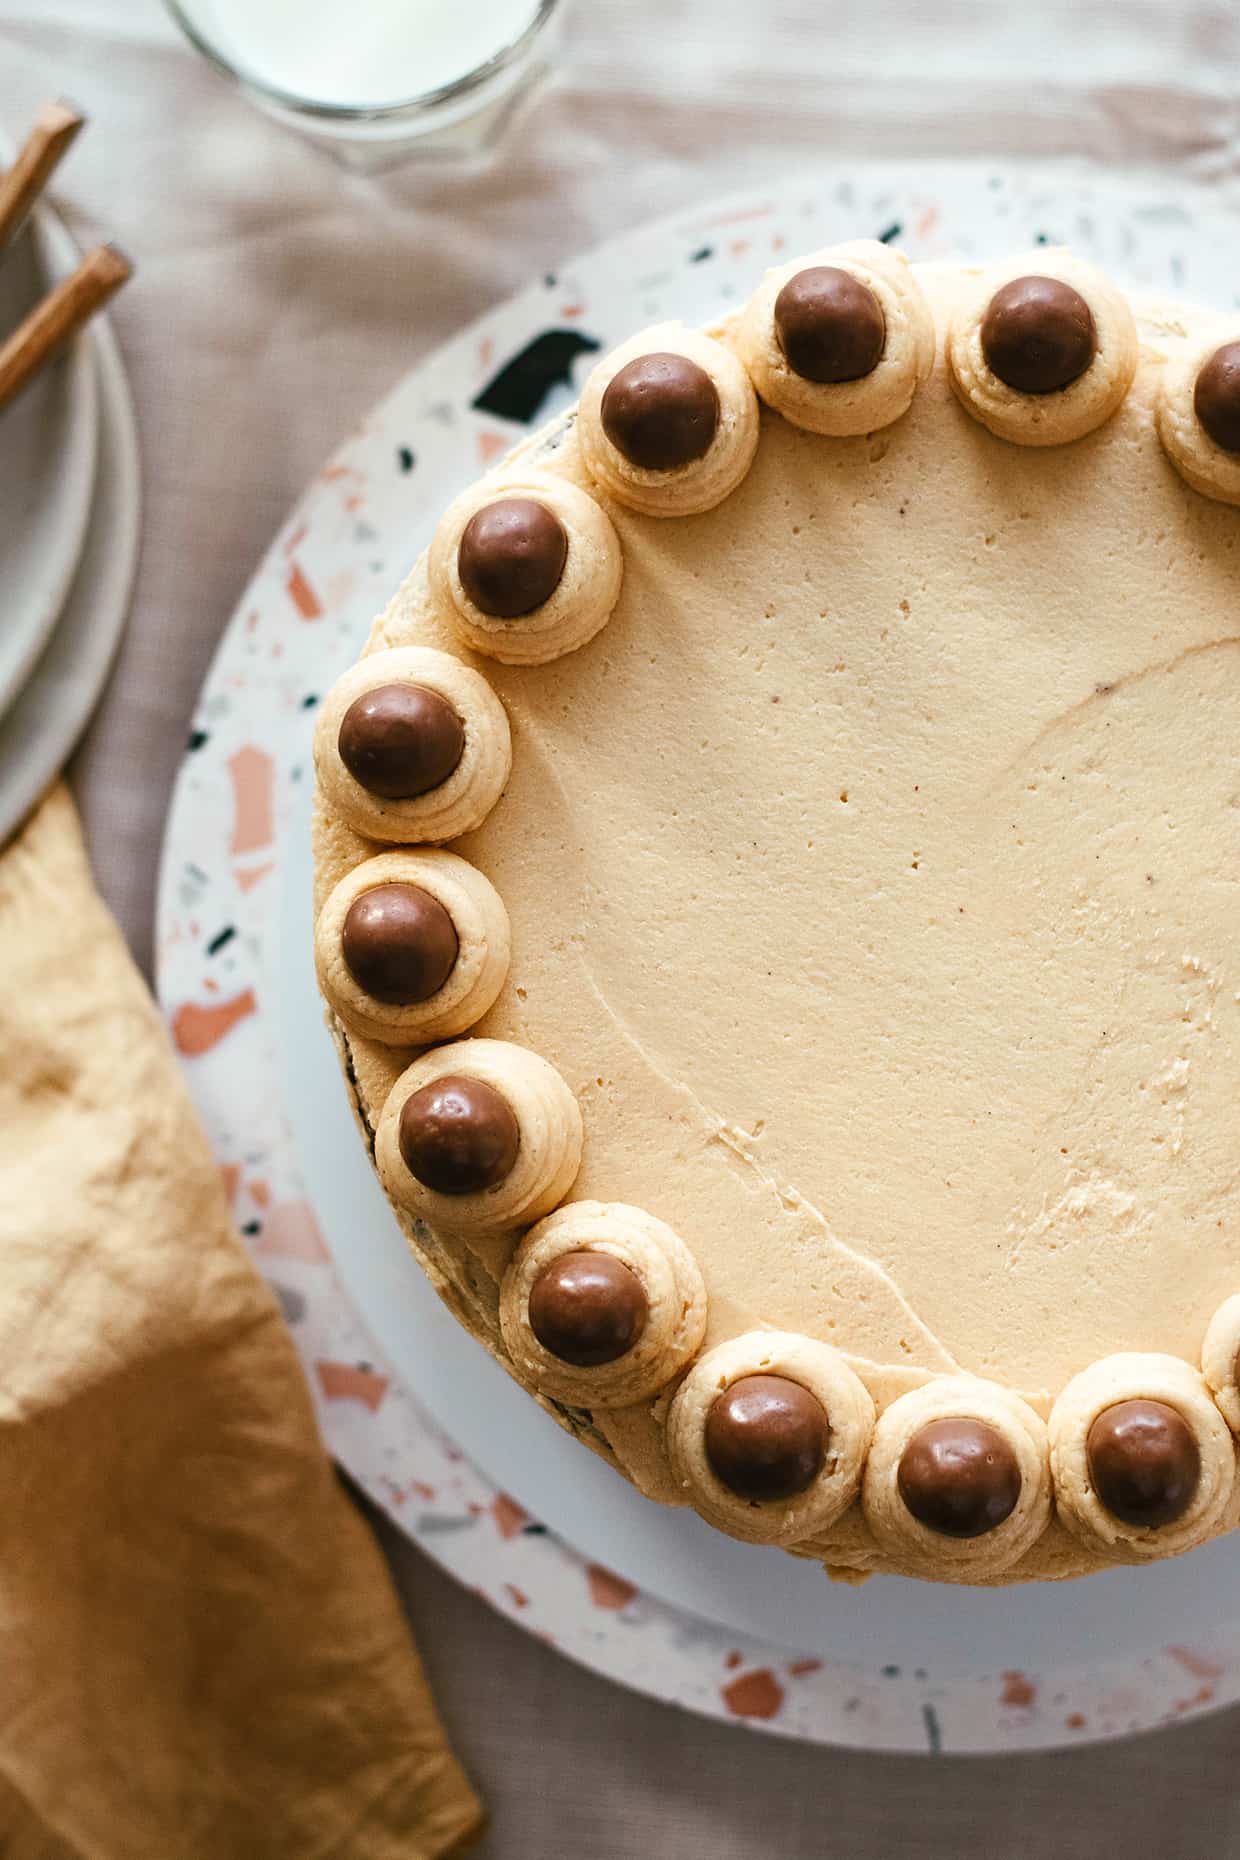
Despite it’s modest yet cute appearance, this is a very filling cake. One two-layer 8-inch cake can easily feed 10 people. Or even more, if you slice it very thinly.
To slice it super thin (think of one slice per one malt-ball), you need to slice it right after you take it out of the refrigerator. A cold cake will give you clean, sharp slices. Clean your knife under hot water before each new slice. And don’t forget to let the slices rest before serving.
This cake is just what the name implies: rich, deeply chocolatey, filled with a luscious sweet peanut butter frosting. It is simple to make, with only two cake layers and a 3-ingredient frosting. You can make it ahead of time, as it will stay flawless in the refrigerator overnight (even up to 2-3 days).
A few more chocolate recipes for any craving you might have
- Peanut butter hot chocolate (made with peanut butter cups!)
- Chocolate chip loaf cake (perfect for Sunday baking)
- Coconut peanut granola bars (dipped in chocolate and great for work and school)
- Caramel Biscoff rocky road (so crunchy and delicious)
- Thick chocolate chip cookies (made with mini eggs, but swap those for M&Ms and you’re golden)
- Italian almond cookies with cocoa (these are vegan and great to have with coffee)
Recipe
Rich chocolate peanut butter cake
Ingredients
- 2 cups all-purpose flour
- 10 tablespoons unsweetened cocoa powder (Dutch-processed)
- 1 1/2 teaspoons baking powder
- 1 teaspoon baking soda
- 1 teaspoon fine sea salt
- 1/2 cup sunflower oil (or other neutral-tasting oil)
- 1 1/2 cups white granulated sugar
- 1 teaspoon vanilla extract or vanilla bean paste
- 2 large eggs
- 3/4 cup whole milk
- 1 cup strong coffee hot
- 1 tablespoon sweet hot cocoa powder see notes for more information
- 3 sticks unsalted butter softened
- 2 1/2 cups creamy peanut butter see notes for more information
- 4 1/2 cups powdered sugar
- 2 teaspoons vanilla extract or vanilla bean paste
- malt chocolate balls
Instructions
- Prep:Preheat oven to 350°F (175°C). Take two 8-inch (20-cm) cake pans and butter/oil the bottoms and sides. Line bottoms with a round of parchment paper, butter/oil the paper too. Dust with flour.
- Make batter:Sift flour, cocoa powder, baking powder, baking soda and salt into a medium bowl. In another bowl, whisk oil with sugar and vanilla. Beat in eggs one by one. Alternately beat in flour and milk, starting and ending with flour (flour-milk-flour-milk-flour). Scrape down the sides of the bowl.
- Whisk sweet cocoa powder into the hot coffee until it’s melted completely. Slowly whisk this into your batter and combine well. Divide the batter between the 2 prepared pans.
- Bake for 30-35 minutes or until a cake tester inserted into the center comes out clean. If the cakes have risen too much in the center (and have that dome shape) gently press them down to flatten, using a damp tablecloth.
- Allow cakes to cool in the pans for about 15 minutes. Invert the cakes onto wire racks, peel off the parchment and let cool completely.
- Make the peanut butter frosting: In a large bowl and using an electric mixer, beat butter with peanut butter until fluffy. Gradually add powdered sugar, starting with 1 cup at a time. Mix thoroughly before adding more. Add the vanilla and beat on medium speed for a few minutes until the frosting is fluffy and light.
- Assembly:Place one cake layer (flat side down) on a cake board or serving plate. Spread about 1/3 of the frosting (or a bit more) evenly over the top. Cover with the second layer, this time flat side up. Spread 1/3 of the frosting on top and the sides. Put the rest of the frosting in a piping bag. Chill cake and the bag with frosting for 15-30 minutes.
- Take cake out of the refrigerator. Frost the sides of cake again if you want a smooth (non-naked) finish. To decorate, pipe dollops on top of cake (to make a crown). Place a malt chocolate ball onto each dollop.
- Refrigerate cake for it to fully set. Take it out about 30 minutes before serving for best flavor. Keep leftover cake in the refrigerator and eat within 2-3 days.
Notes
- Sweet cocoa powder is the kind you buy to make hot cocoa at home. Think Nesquik, Ghirardelli, Godiva, etc. It is a complete opposite of the unsweetened cocoa powder you’re also using to make the cake. Make sure you have both and use as instructed.
- Creamy or smooth peanut butter: get the commercial kind. I have used different brands, all with salt and sugar added. Some are also made with an addition of neutral oil. I find that this type of peanut butter is the best for making frosting or baking cookies/cakes. It holds up better.
- This is a very rich and filling cake. For thin, sharp slices it is best if you cut the cake when it’s cold, straight out of the refrigerator. Then allow the slices to rest at room temperature for at least 20-30 minutes (depends on your indoor temperature) before serving.