Making homemade dough ornaments has never been easier with this recipe for Homemade scented baking soda ornaments. You only need a handful of ingredients to make a beautiful smooth dough, much like playdough or clay. Decorate it any way you like and let it dry. The result are fabulous Christmas ornaments that you can use for your tree or as gift tags.
I am a firm believer in having fun at any age and being crafty at any age. Doing things away from the various screens in my home always calms me down and helps me feel grounded. When winter starts knocking on the door and I start thinking of decorating my Christmas tree (my favorite activity!) I immediately think of cornstarch and baking soda ornaments.
Making dough for Christmas ornaments was one of those popular crafts they had us do in preschool, because it’s a safe and fun activity for all ages. I get nostalgic thinking about those years. I still have a box of 90s colorful bulbs and ornaments stashed away in the basement somewhere. And I still love making homemade ornaments.
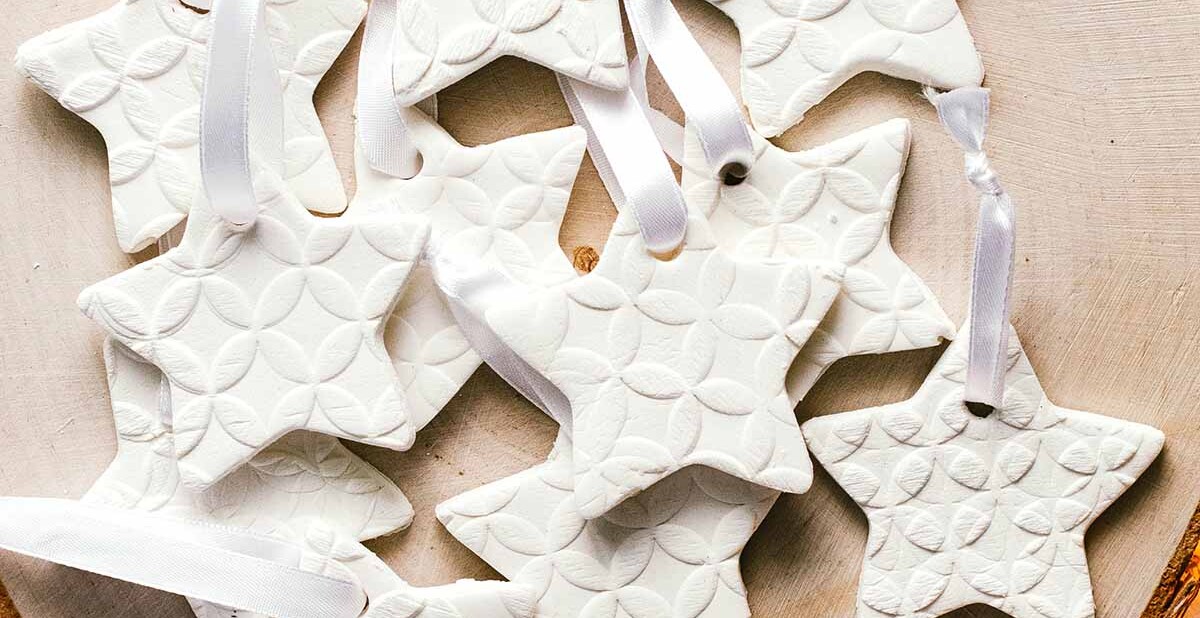
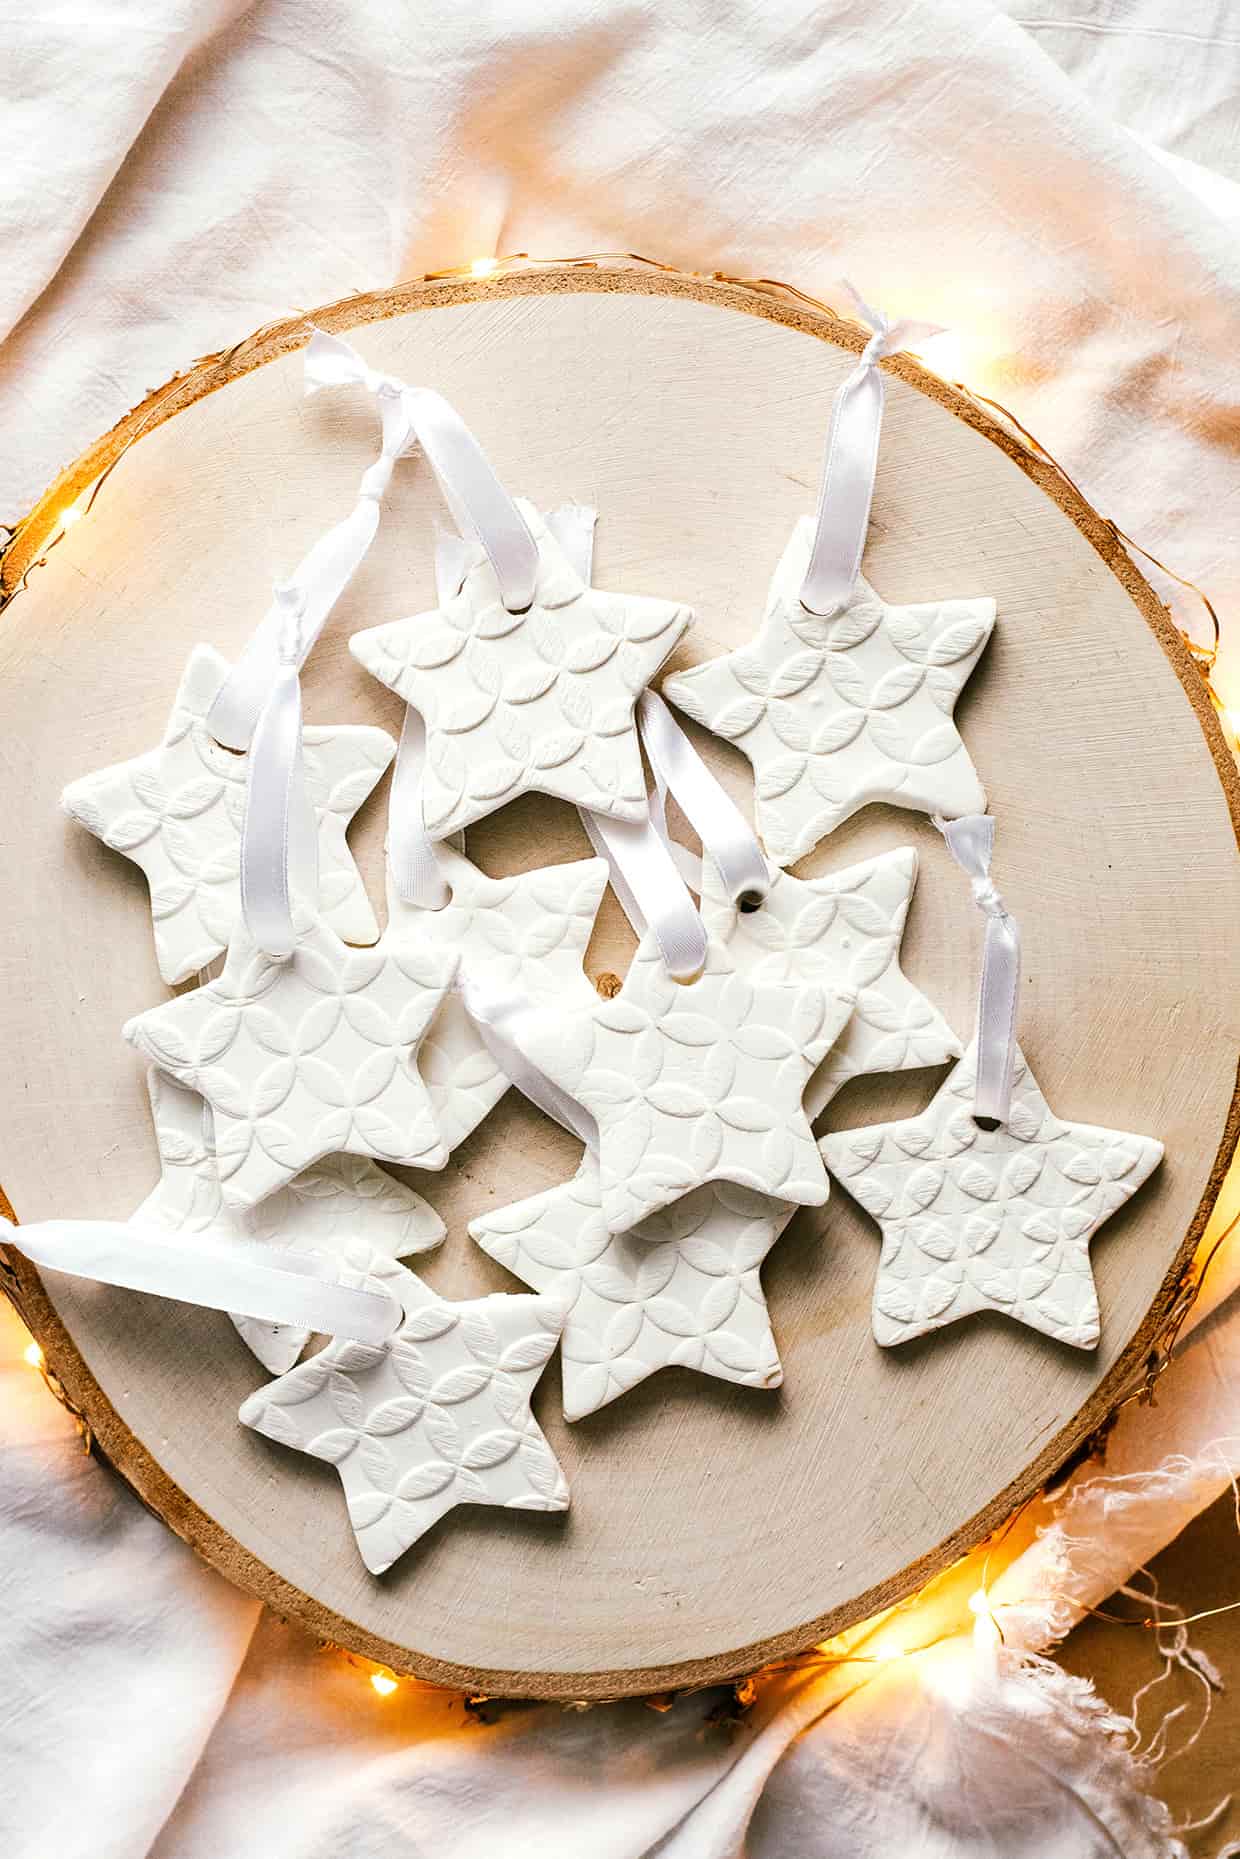
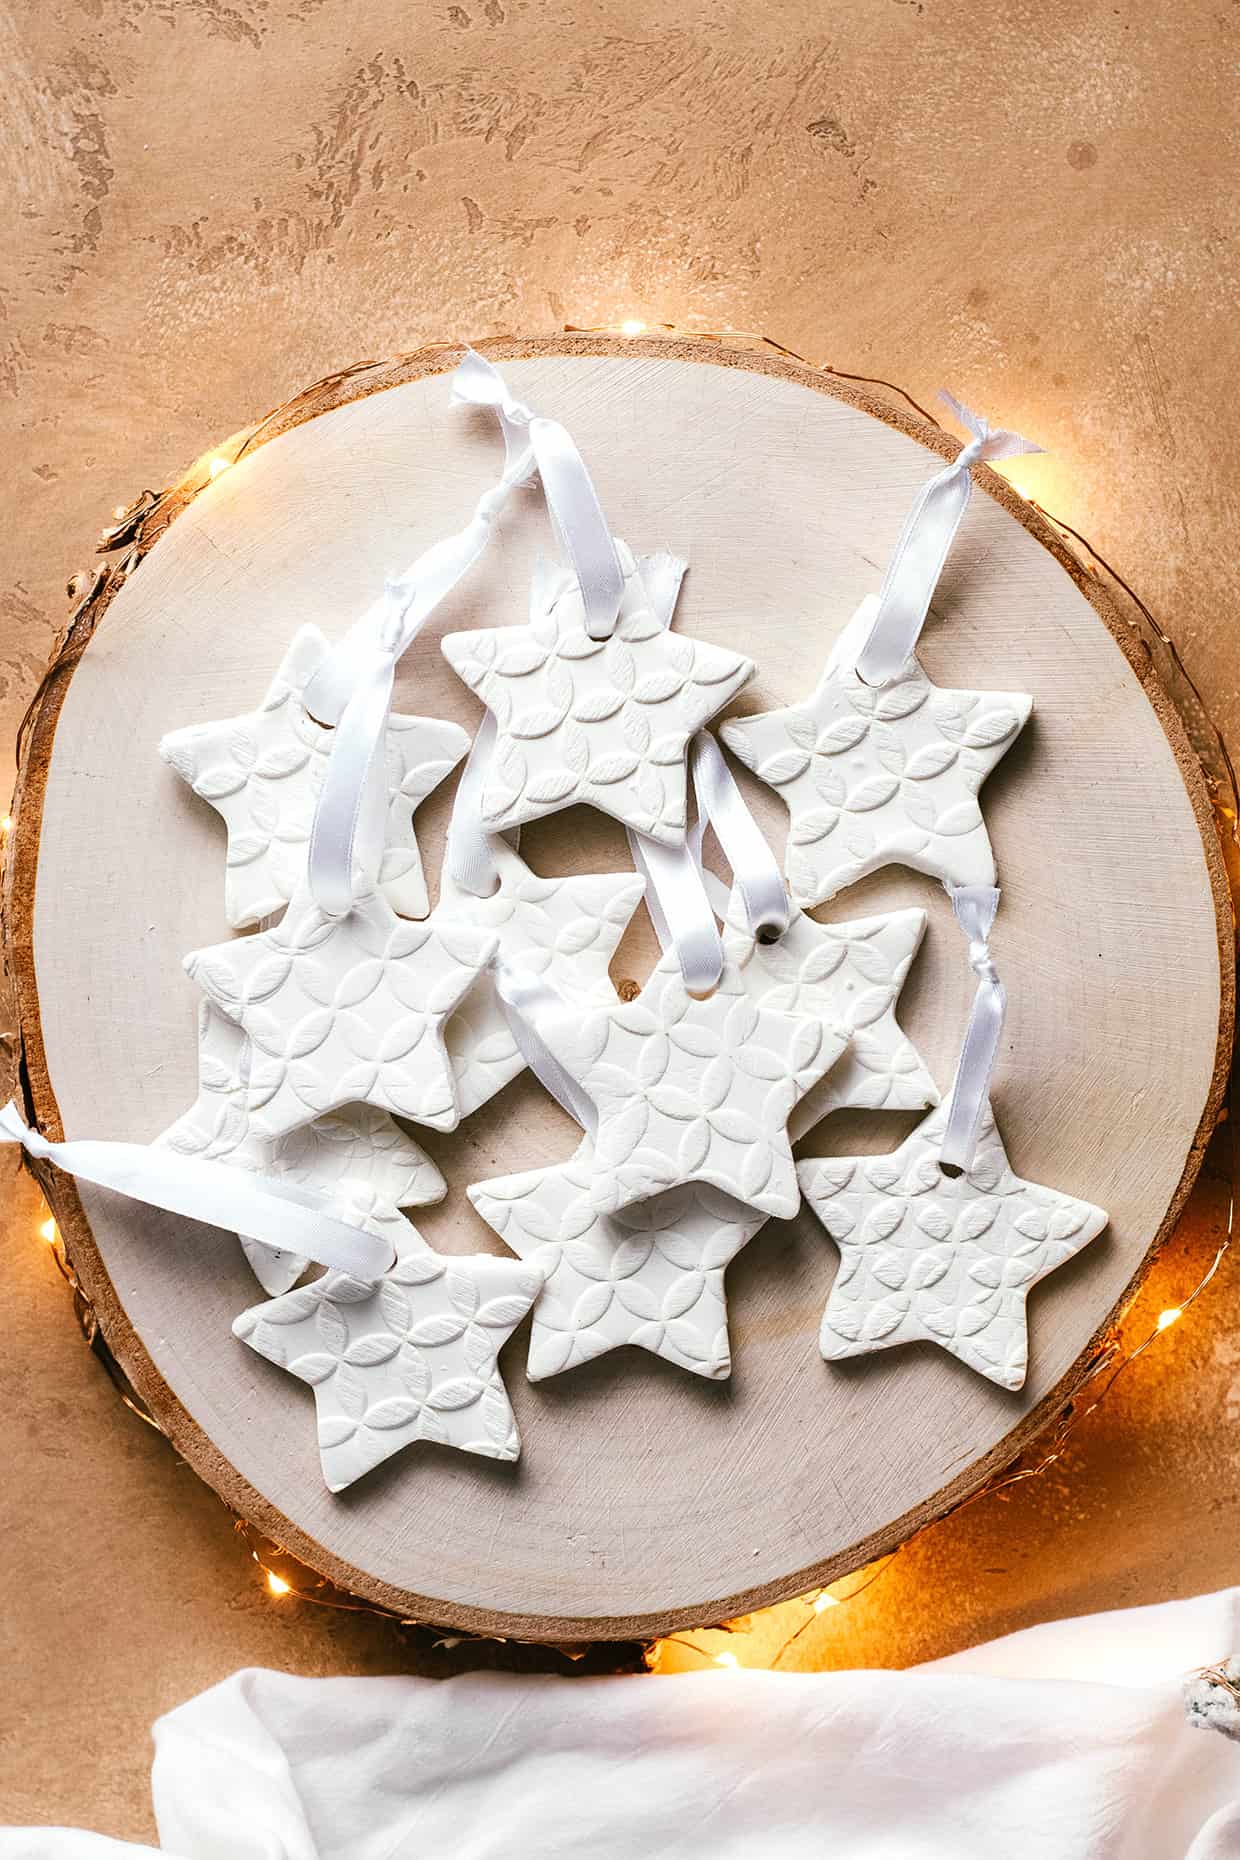
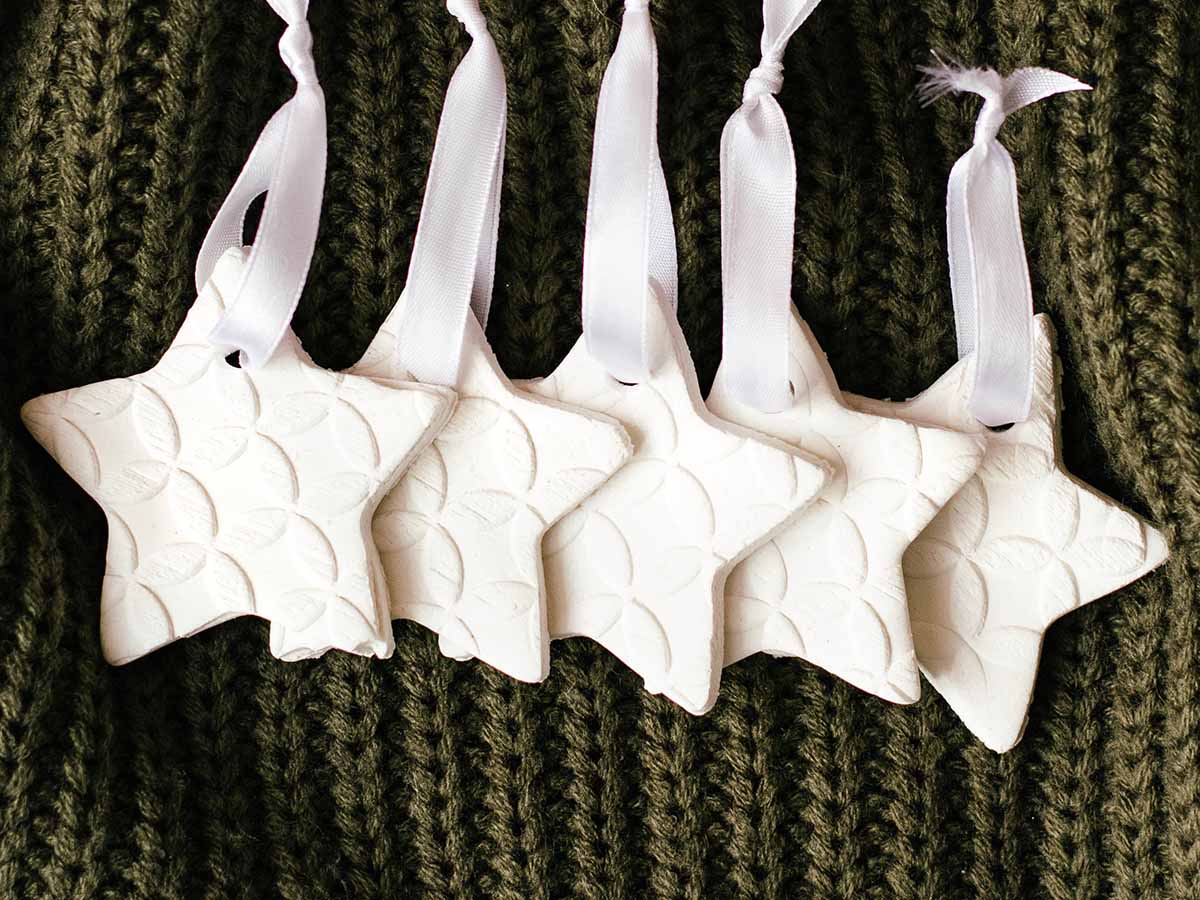
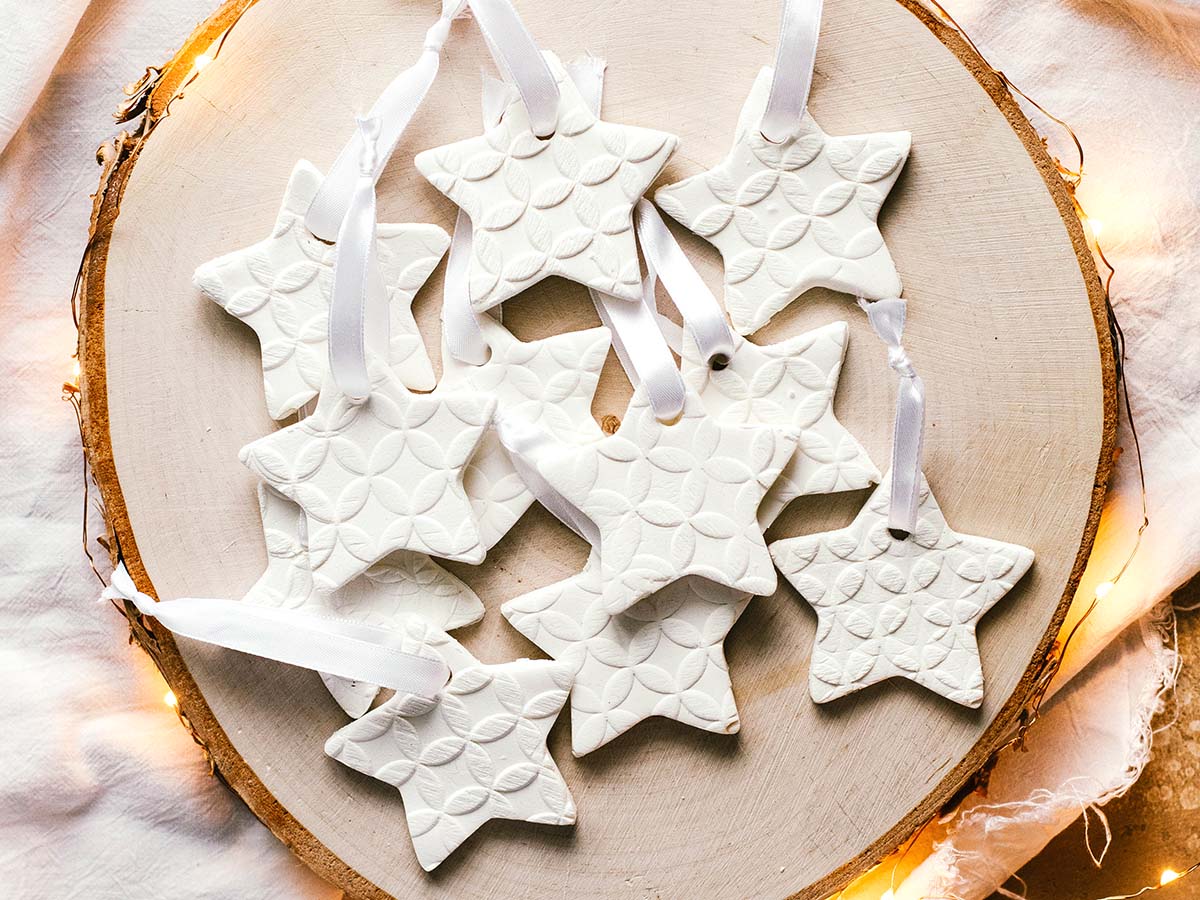
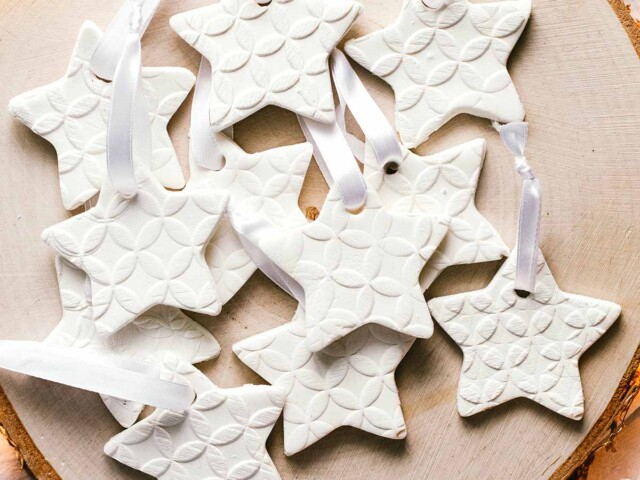
These beautiful snow-white dough ornaments aren’t just adorable, they are also a very affordable alternative for your typical winter decorations. I think they can cozy up any part of your home. And they fit really well with any decor, because they look more like winter decorations and not just Christmas ornaments.
Dried ornaments are smooth and can be painted any color or drawn on with pretty markers, which makes this a fun DIY activity you can do with your children.
Why I love homemade ornaments
- They are affordable. A pack of baking soda and cornstarch are so cheap, but they will give you a good amount of ornaments. We all know how various decorations can quickly add up, so I love the idea of making something out of almost nothing.
- Easy to make. This recipe is very straightforward, you don’t need to be an experienced crafter to pull it off.
- Can be shaped any way you like. The possibilities are endless. Personally, I have a favorite cookie cutter that’s shaped like a cat and I haven’t seen many cat Christmas decorations. I can make hundreds of little cats this way.
- They last for years! I still have a full container of ornaments I made 3 years ago. As long as you keep them away from moisture, these hold up so well.
Please note that baking soda dough with cornstarch isn’t edible. Which is actually great because you can use expired ingredients for this recipe. If they look and smell okay and aren’t moldy, you can use them no matter what the expiration date says.
Cornstarch is pretty indestructible anyway, as long as you keep it dry. Baking soda might lose some of its strength with age, but you don’t actually need it to do anything in this recipe. So if you wouldn’t make regular cookies with expired baking soda because you’re doubting its leavening strength, you can definitely make Christmas dough ornaments.
How to make baking soda ornaments
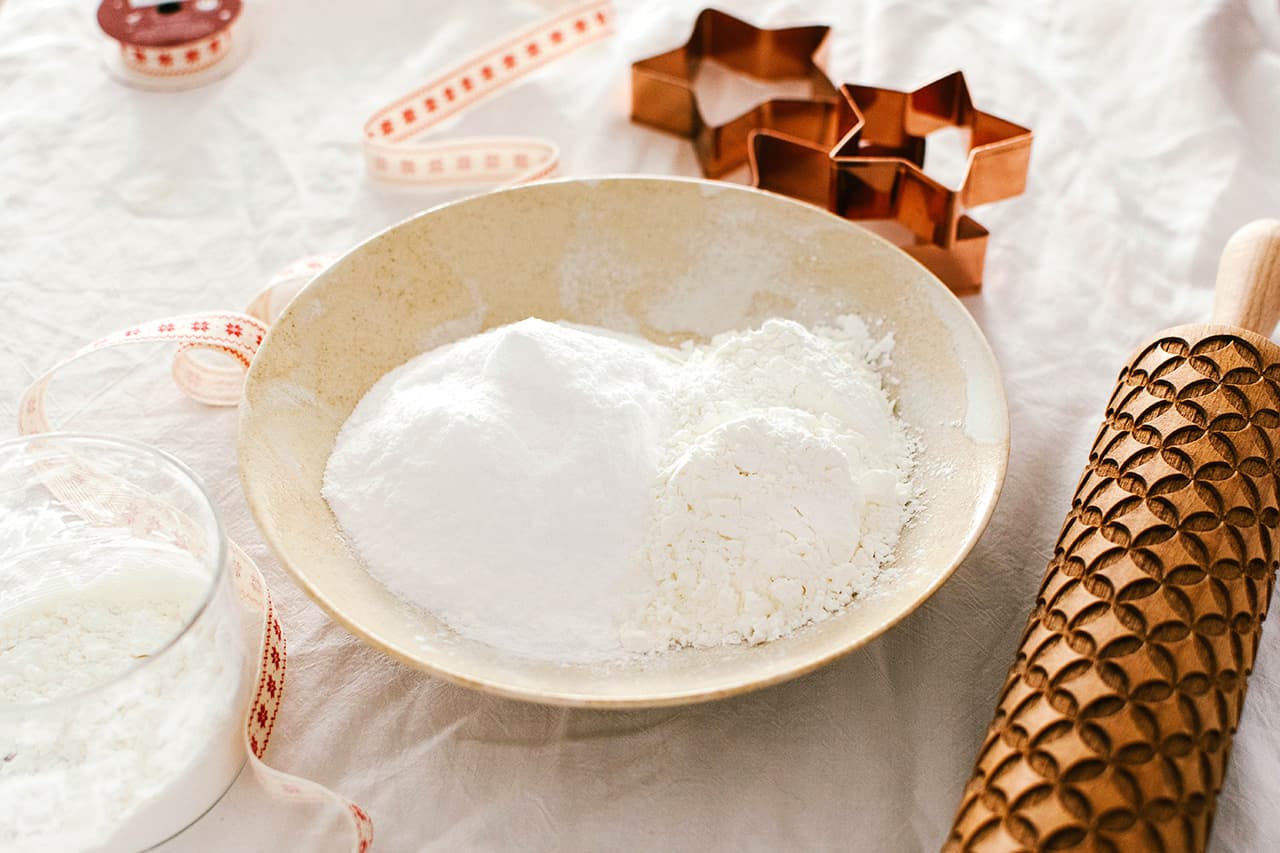
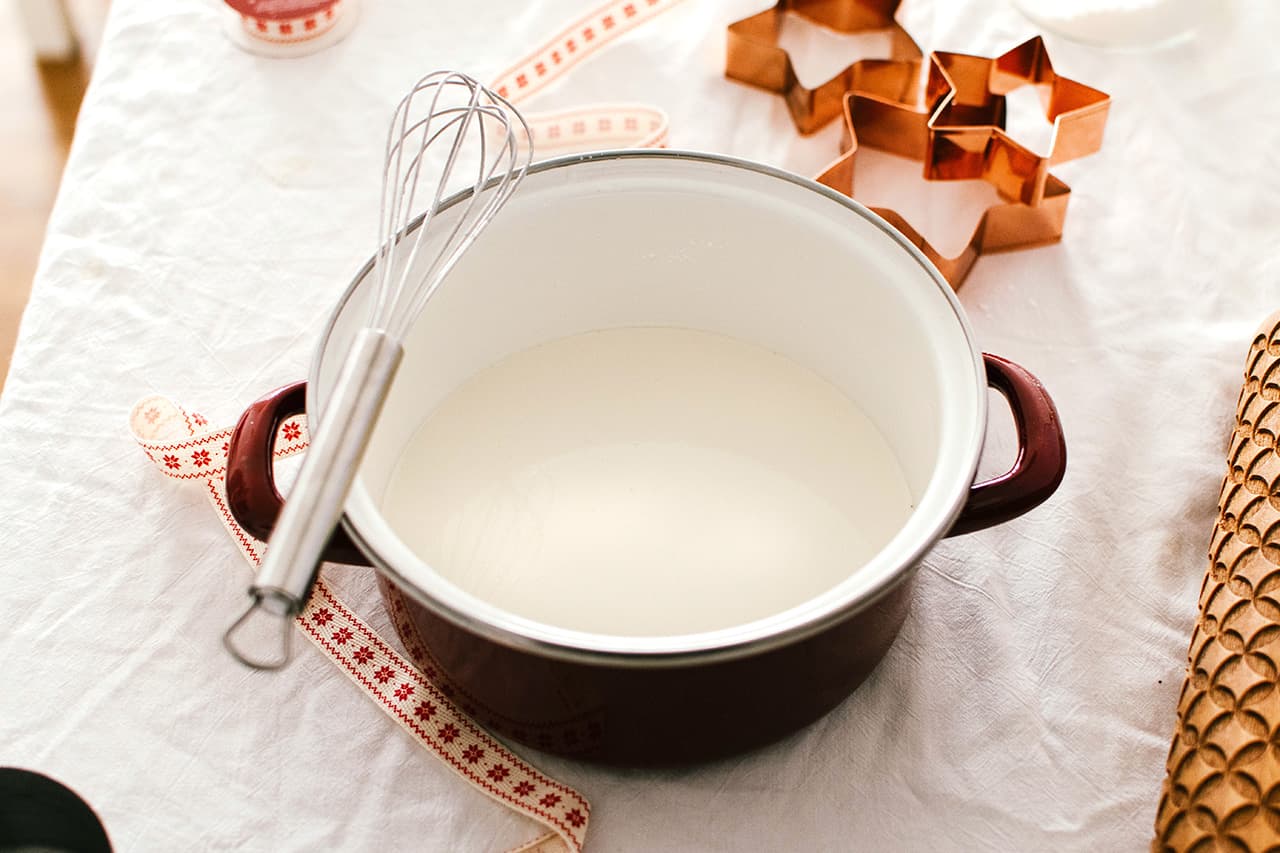
Combine baking soda, cornstarch and water in a saucepan. Whisk until completely combined and your mixture looks like velvety milk.
Cornstarch is a bit tricky to mix-in. I find that it just sticks to the sides of the pot like glue. So make sure you’re hitting all the sides of the pot with your whisk or use a spatula to double check you’ve scrapped off all the starch.
Add your scented oils, if using. I like to use either essential oils or food-grade oils that you can otherwise use for baking. Add a few drops.
Even if the smell is overpowering, know that the final dried ornaments won’t be that fragrant. So it’s better to add too much than too little. If you want, this is also when you would add food coloring, if you want to make ornaments of different colors.
Cook this baking soda dough mixture over medium heat for a few minutes, whisking constantly, until it thickens into a paste. This takes around 5 minutes. Remove from heat, give it another good whisk and transfer to a plate to cool to room temperature.
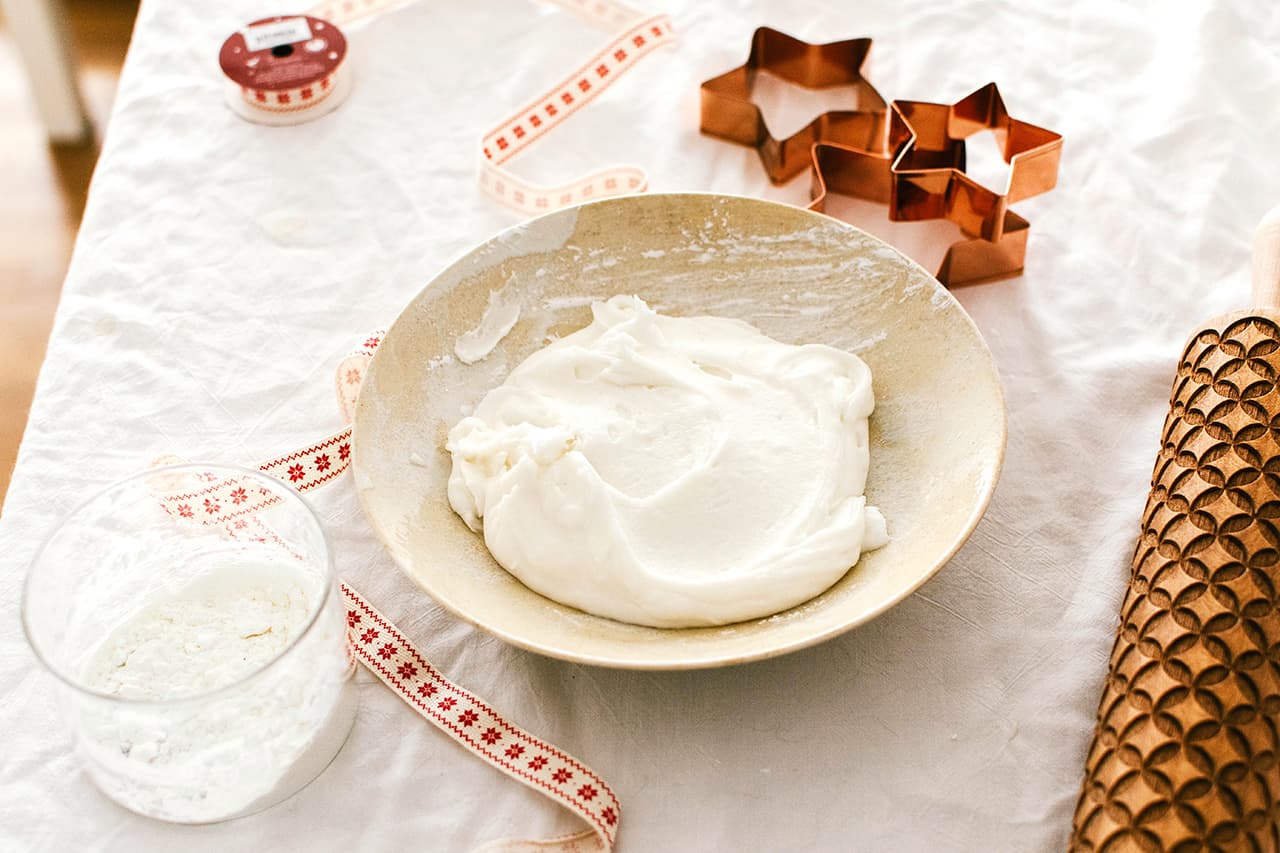
Once your dough is cool enough to handle, it’s time to knead it. It will feel a lot like clay or playdough. Sprinkle your work surface with some cornstarch and knead the ornament dough.
If the dough is too wet and sticky, add a few tablespoons of cornstarch to it. Just so it’s not sticking to your hands, but it is still pliable. If you add too much cornstarch, the dough will be too dry and it will crumble and crack and you don’t want that.
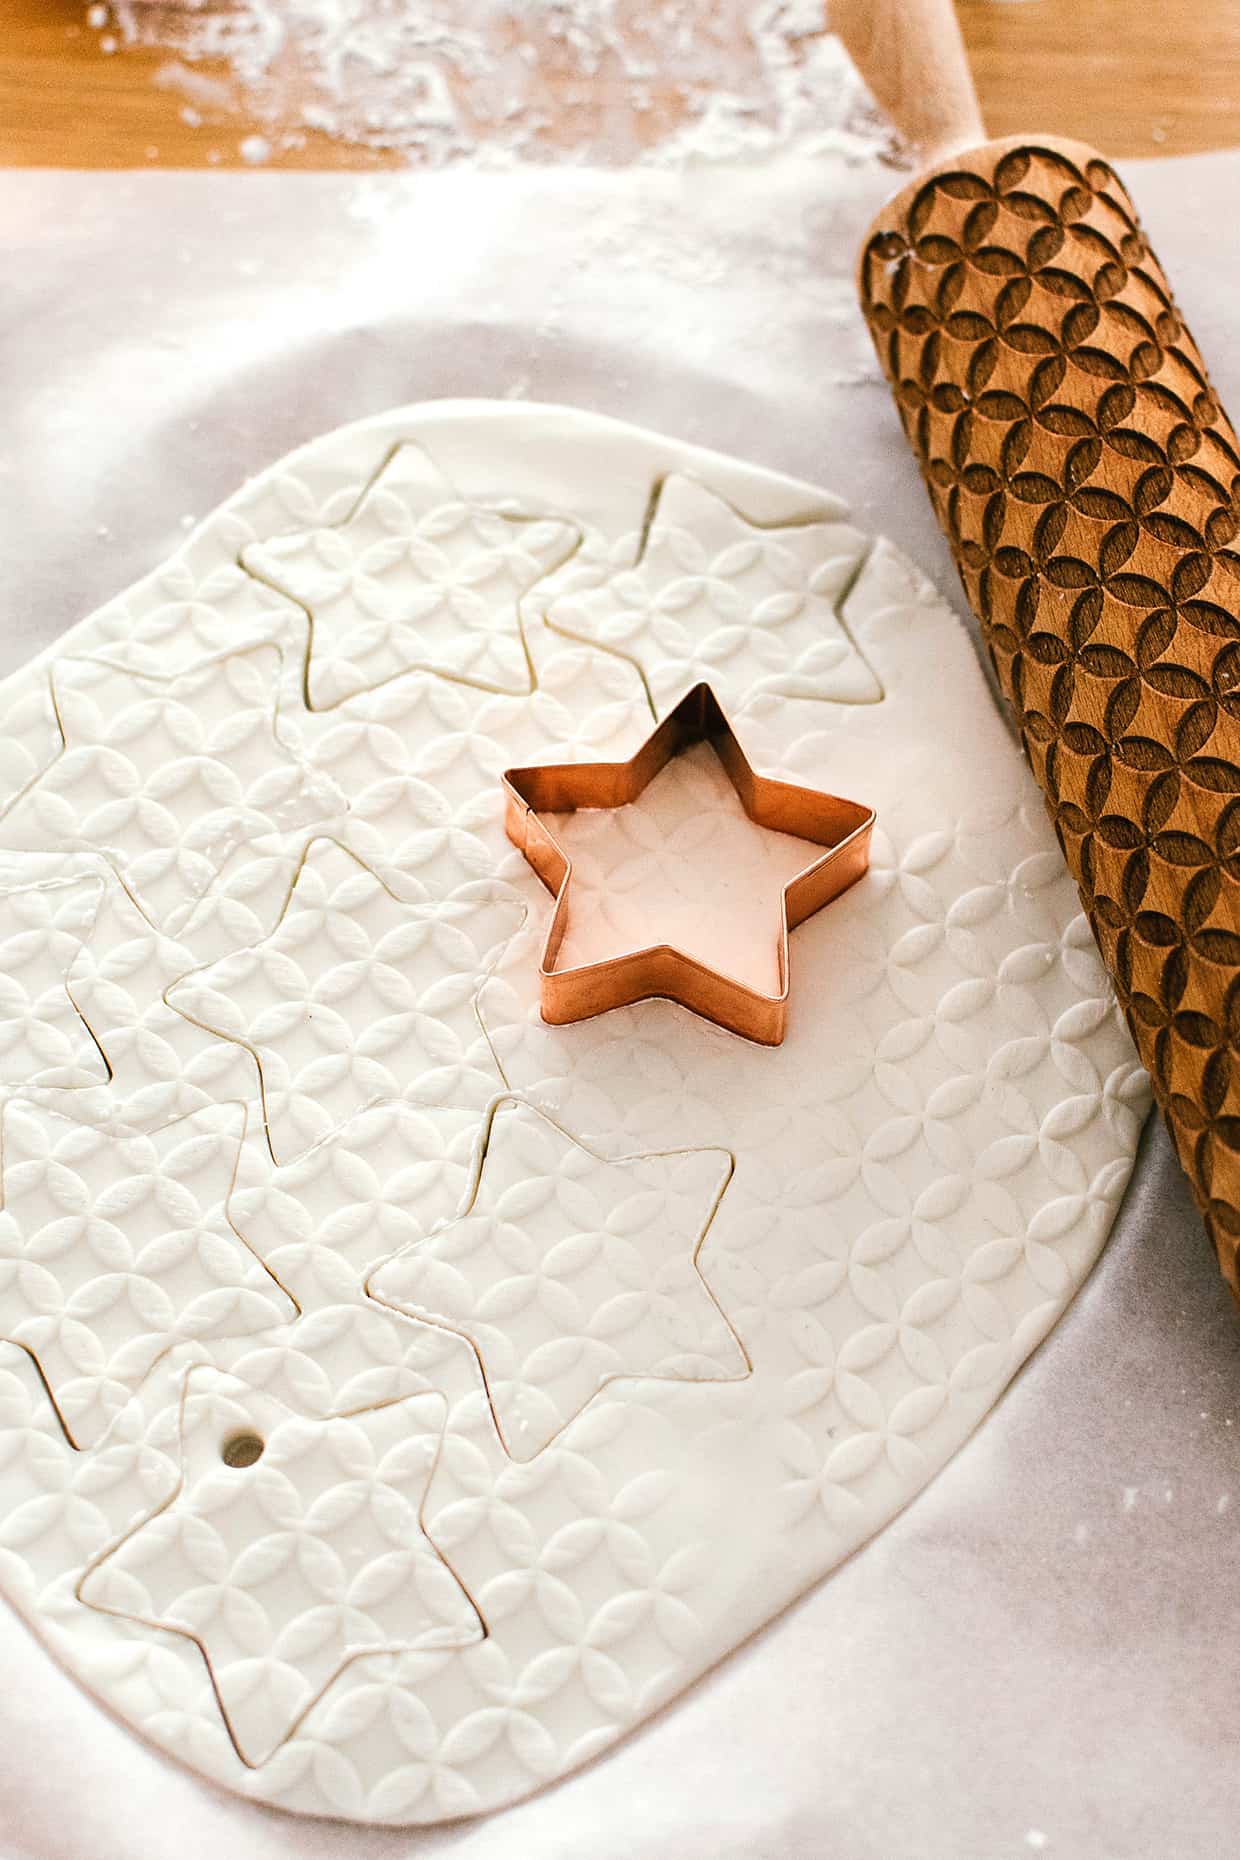
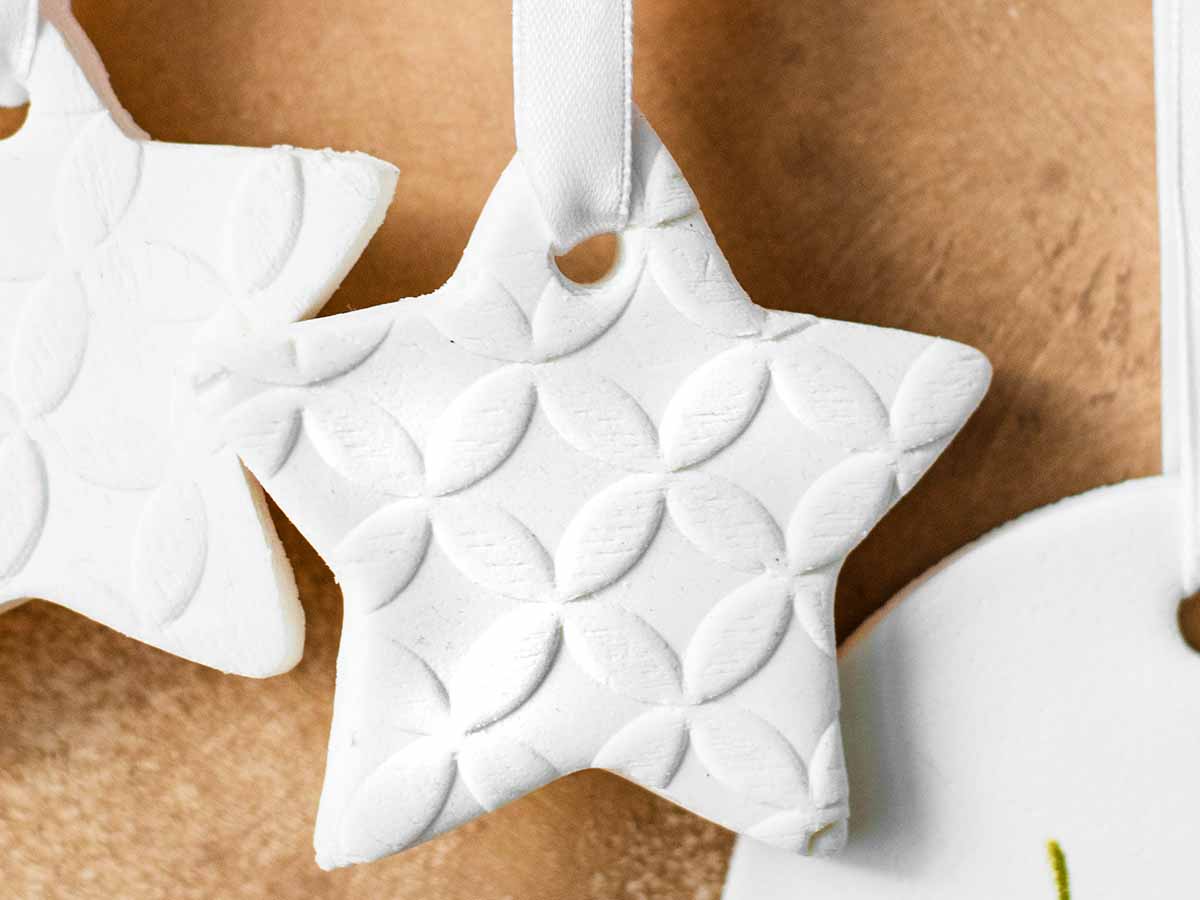
Roll out your baking soda and cornstarch dough with a regular rolling pin. Roll out the dough about 1/4 inch (6 mm) thick at most. You don’t want them too thin as they can be hard to pick up and can break, but no more than 1/4 inch thick as that could make them too heavy. If using a patterned rolling pin, give the dough one final decorative roll-out.
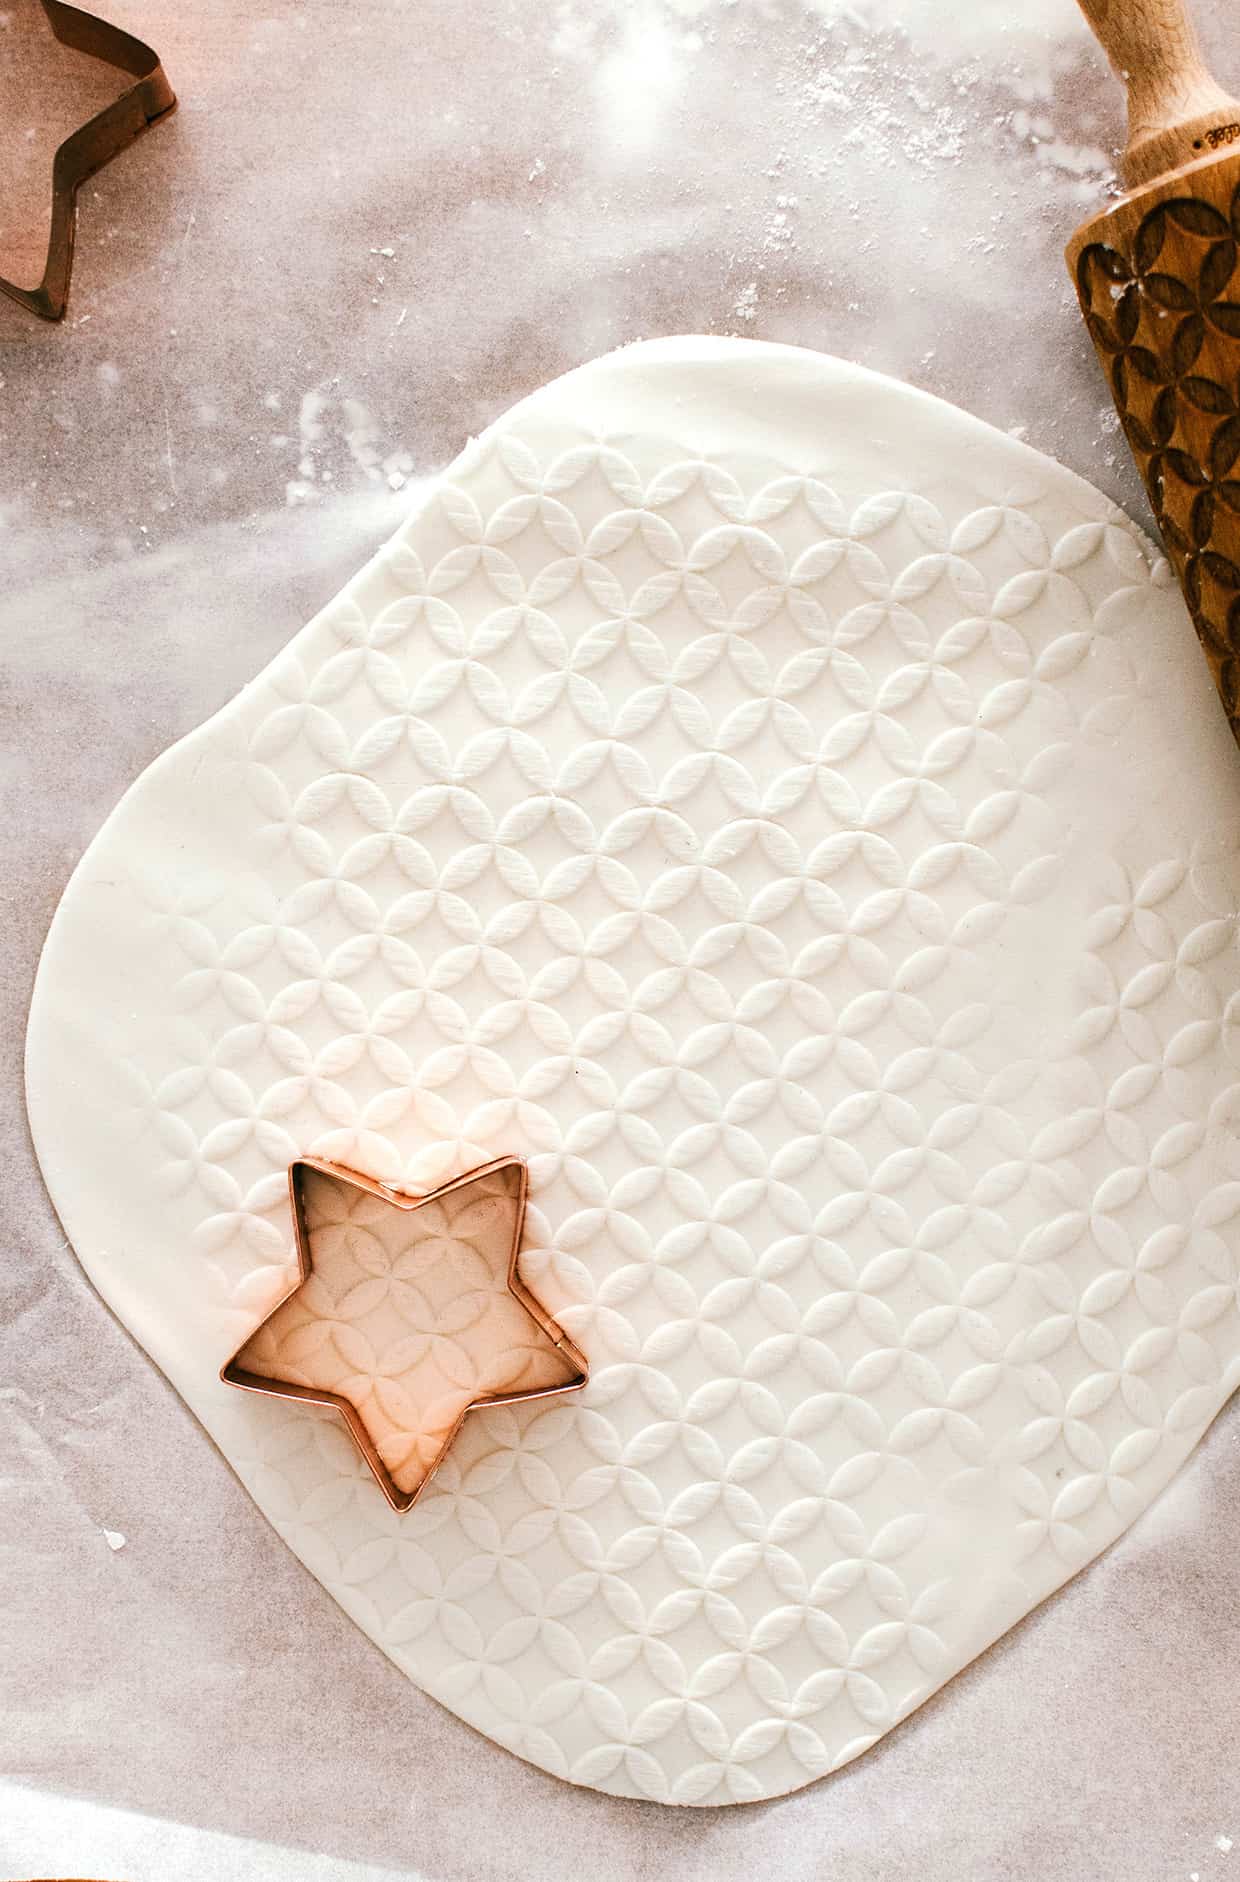
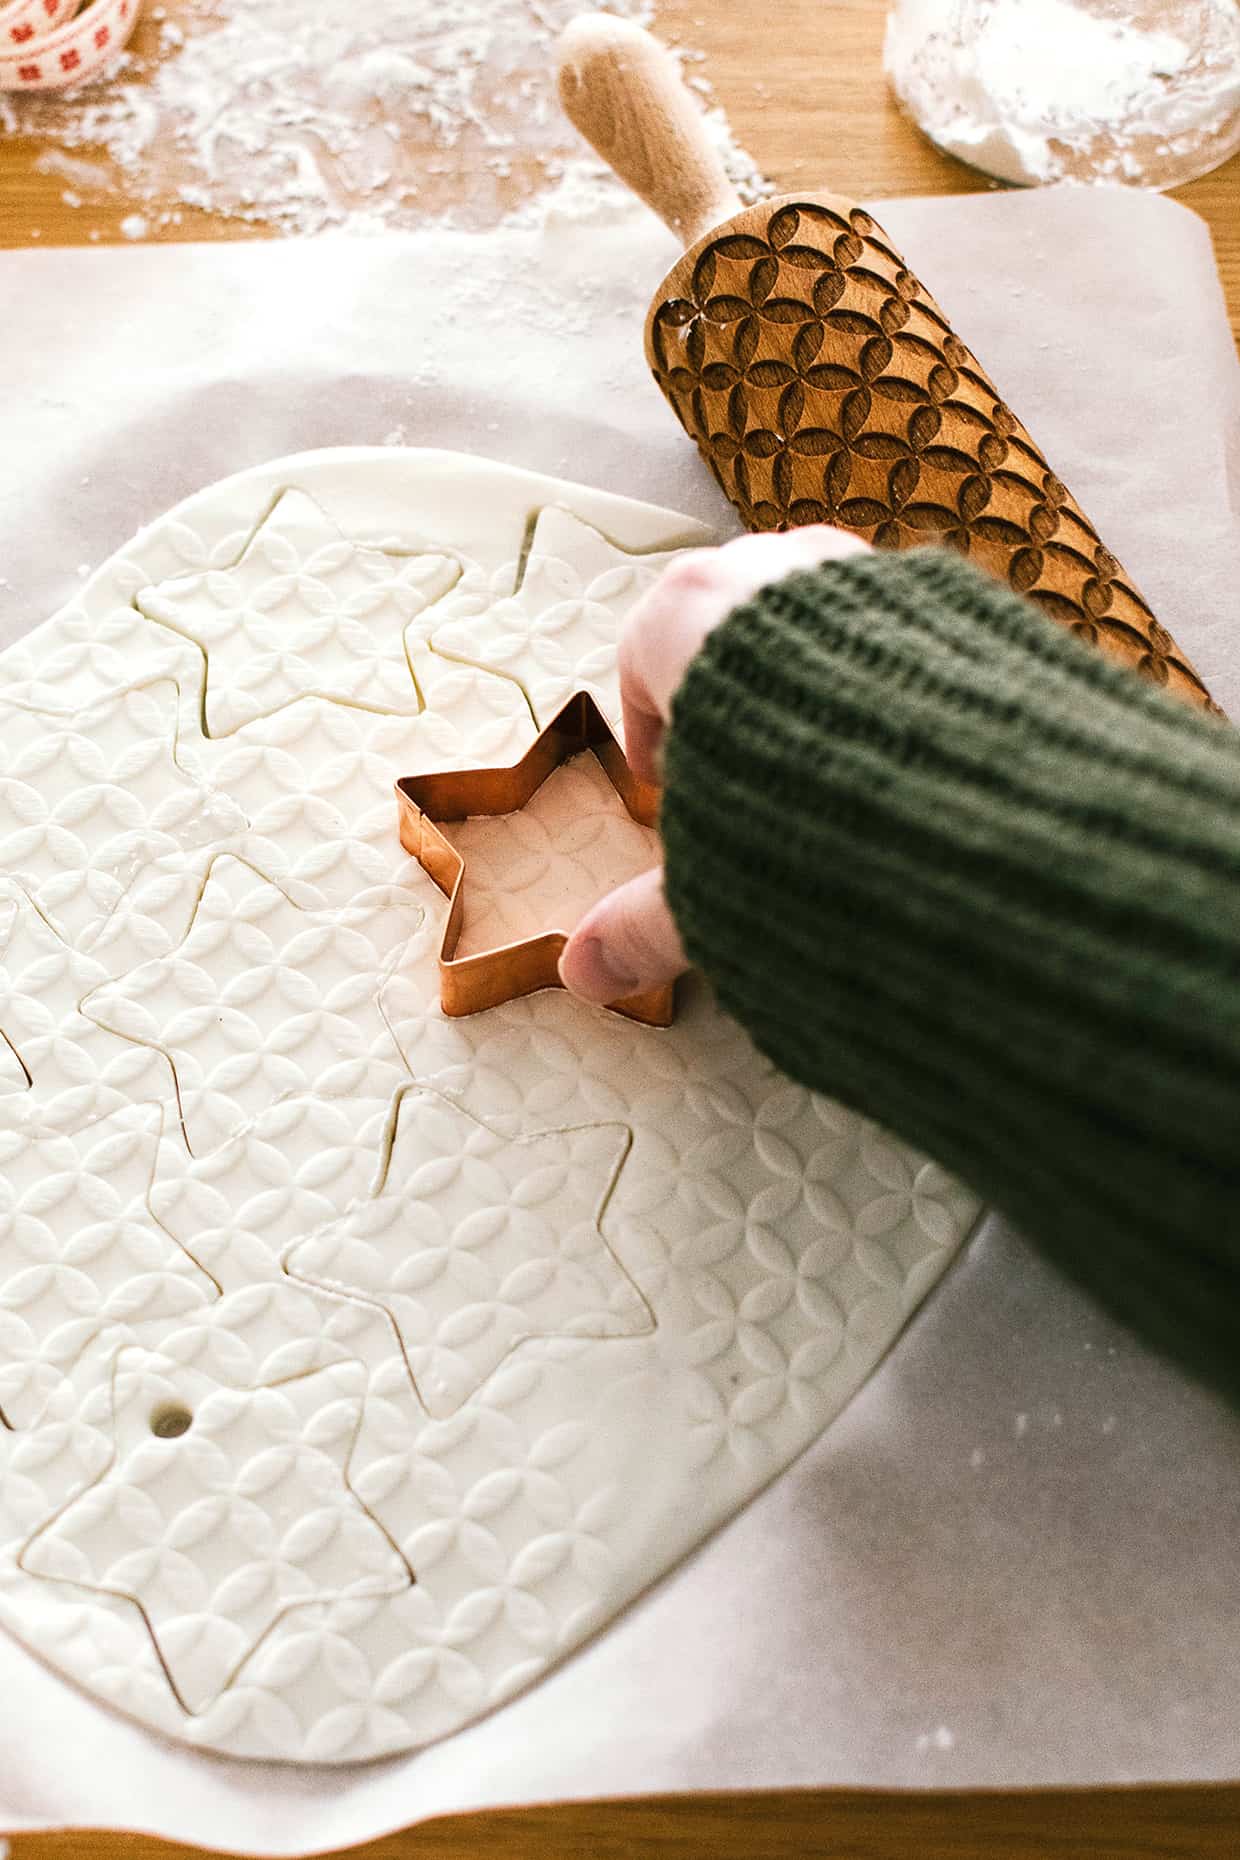
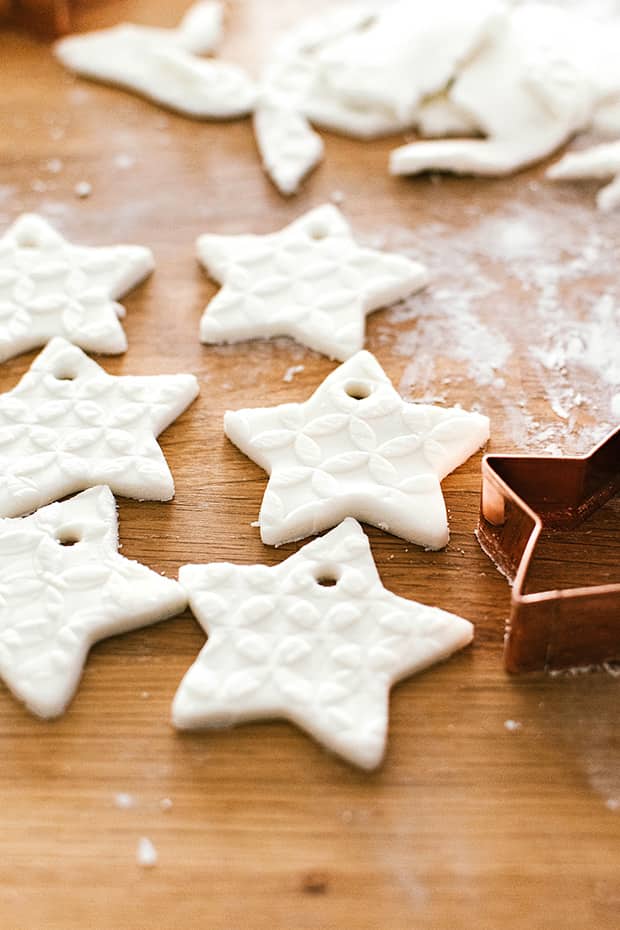
Gather your holiday cookie cutters and cut out your desired ornament shapes. Make holes for string with a straw. Lay ornaments on a baking sheet lined with parchment paper and allow the ornaments to dry overnight.
Tips on drying
There are two methods for drying baking soda cornstarch ornaments. One is air drying, which takes longer. The other method is oven drying, which is faster. However I prefer to air dry homemade ornaments.
Drying ornaments overnight
The best way to dry ornaments and prevent cracking is by drying them on a baking sheet overnight out in the open (like on your kitchen counter or a partially opened oven).
The next day you have to check and see how dry they are. If they still seem damp in the center, gently flip each ornament, so they can dry on the other side as well. Let them dry like this overnight as well.
I’ve never had an ornament crack by doing this. I like to make my ornaments in advance and give them full 2 days to dry before writing on them, adding ribbon or anything else.
Drying ornaments in the oven
The key is really low temperature. Set your oven to 175°F (80°C) and place a baking sheet with your ornaments in the center of the oven. Check on your ornaments every so often, making sure they’re not cracking, browning or similar.
Carefully flip the ornaments on the other side after about 40 minutes. Allow the other side to dry for another 30 minutes. Then you can flip the ornaments again and dry them further if needed.
How much time you need will depend on the size of each ornament, so just keep an eye on them. Thicker or larger ornaments need more time than small ones. In the end, you can also turn off your oven and slightly open it and allow your ornaments to dry like that.
Tips on decorating
Before you start decorating your dough ornaments, it’s important that they are completely dry. If you’re not sure wether they are fully dry or not, it’s better to wait an extra day. Dry ornaments can have some specks of cornstarch leftover, so brush them gently with a brush to remove any excess cornstarch.
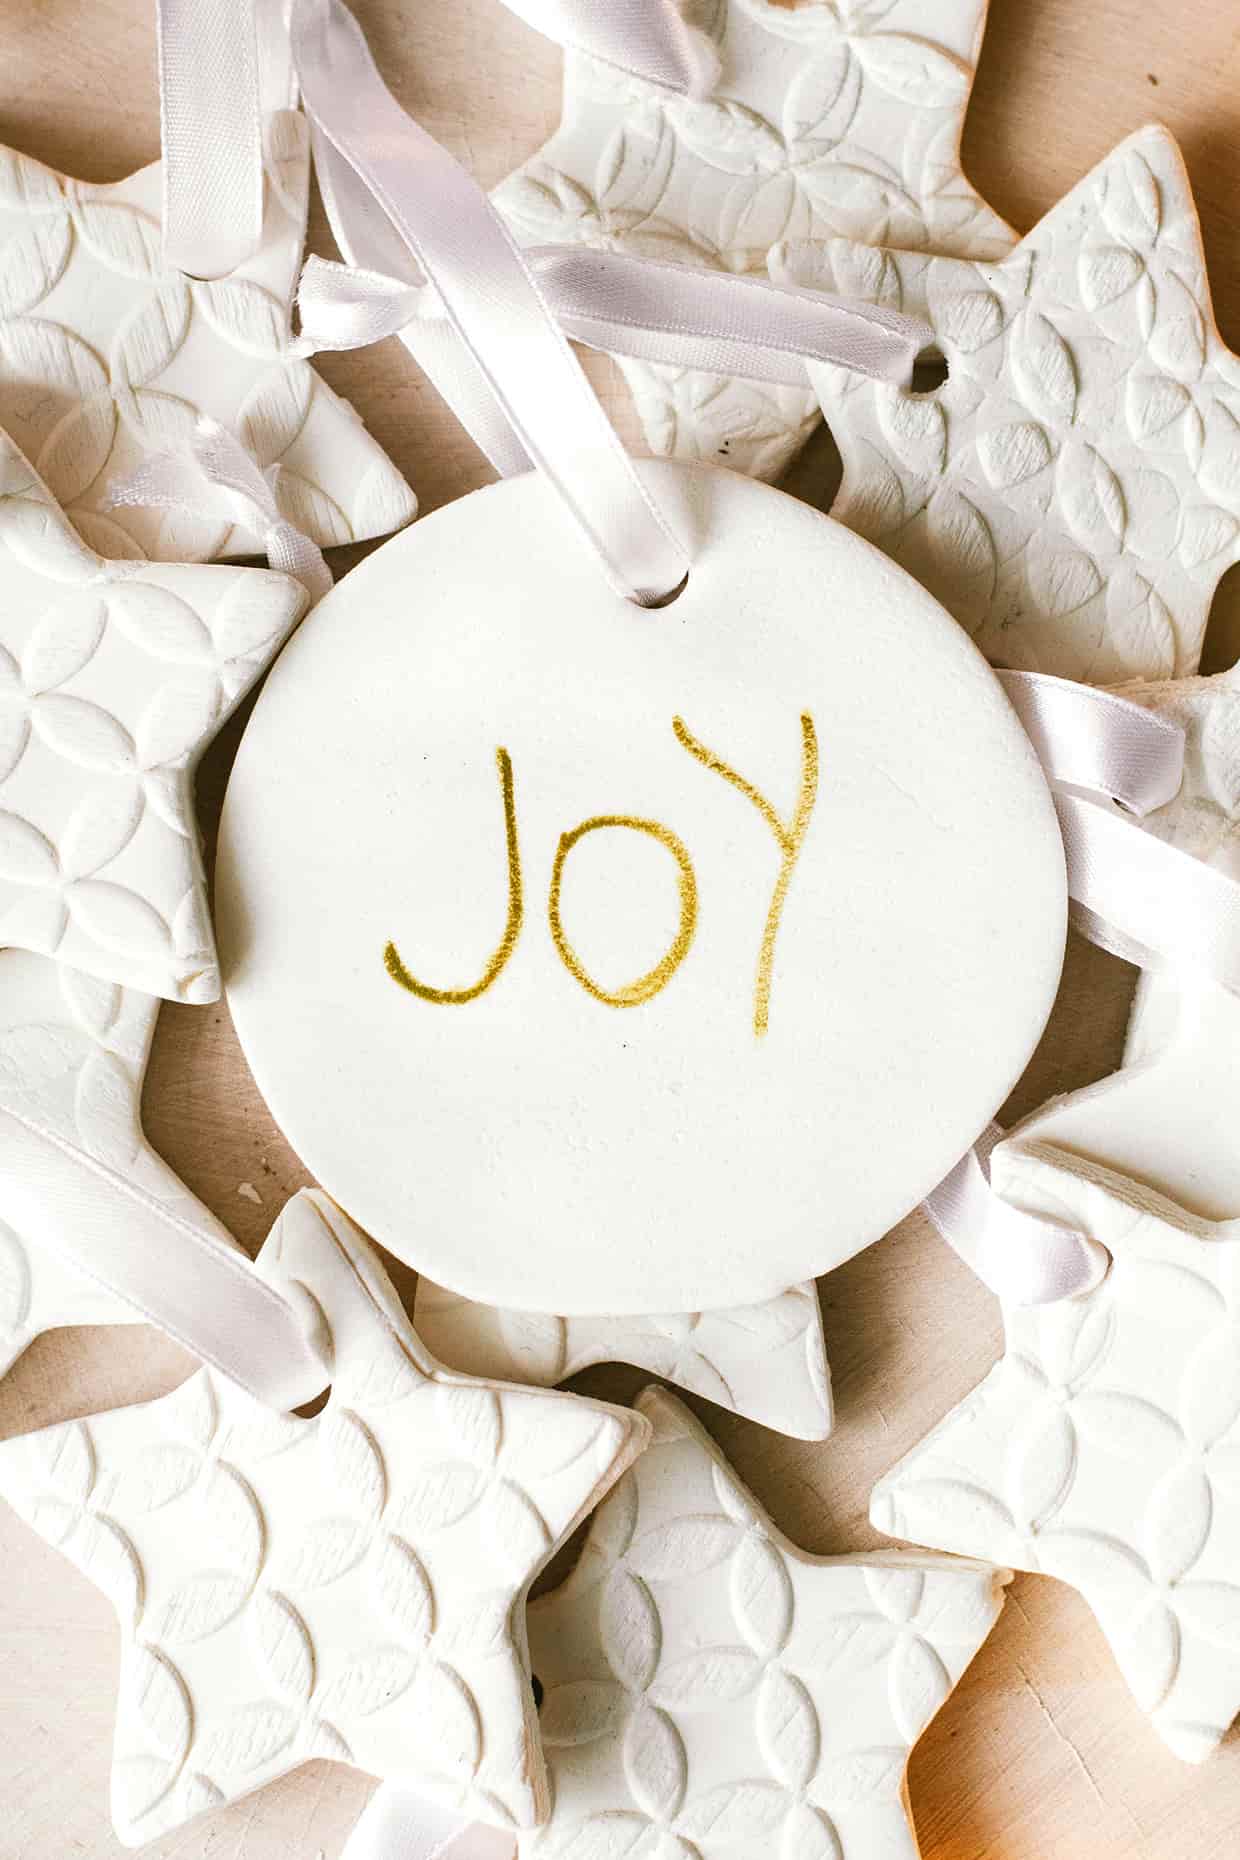
- Add colors: You can paint ornaments lightly with food coloring or watercolors. You can brush them with glitter paints. Or you can draw on them with markers. Know that once you start painting them, you’re adding moisture to the baking soda and cornstarch dough. You need to let the ornaments air-dry again completely, before you really start using them.
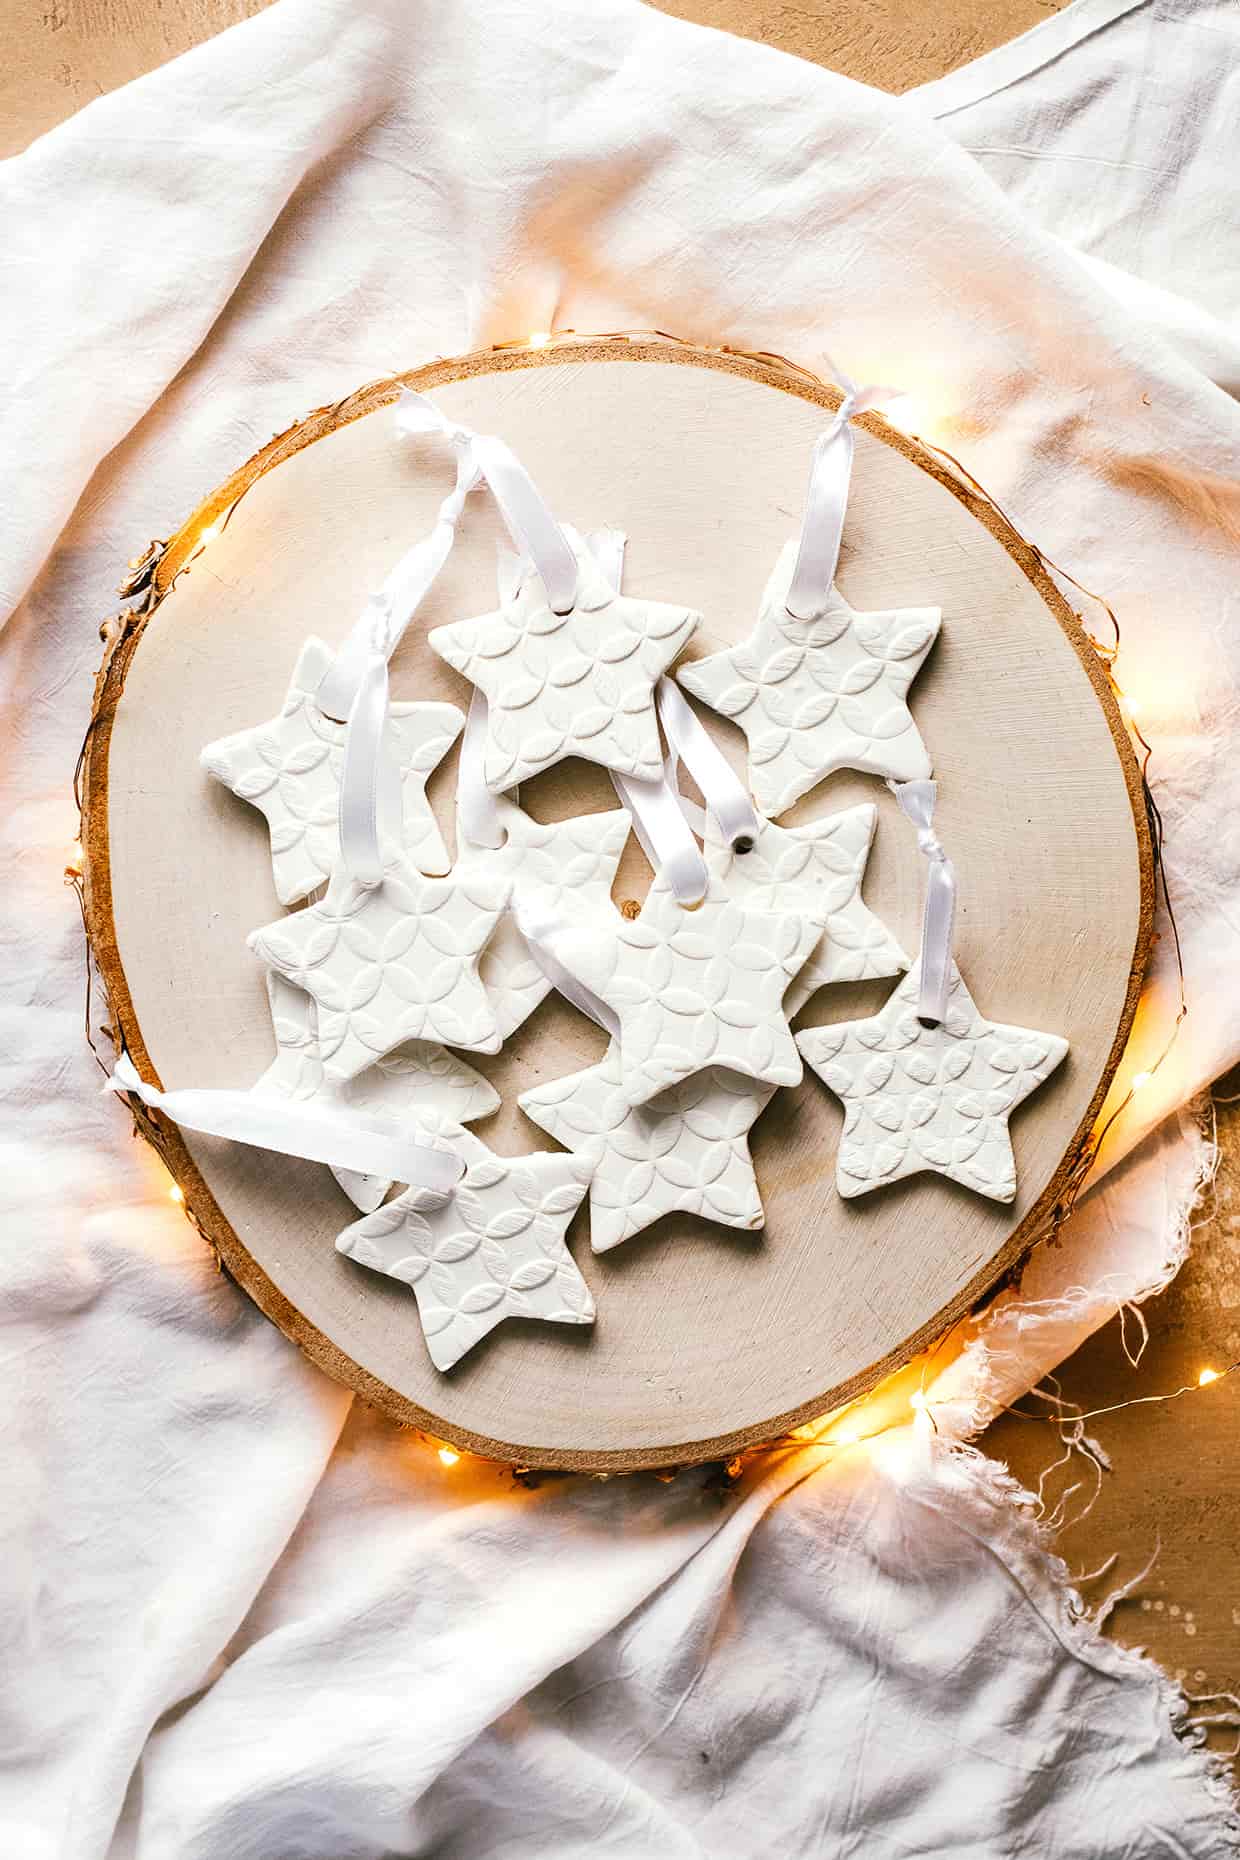
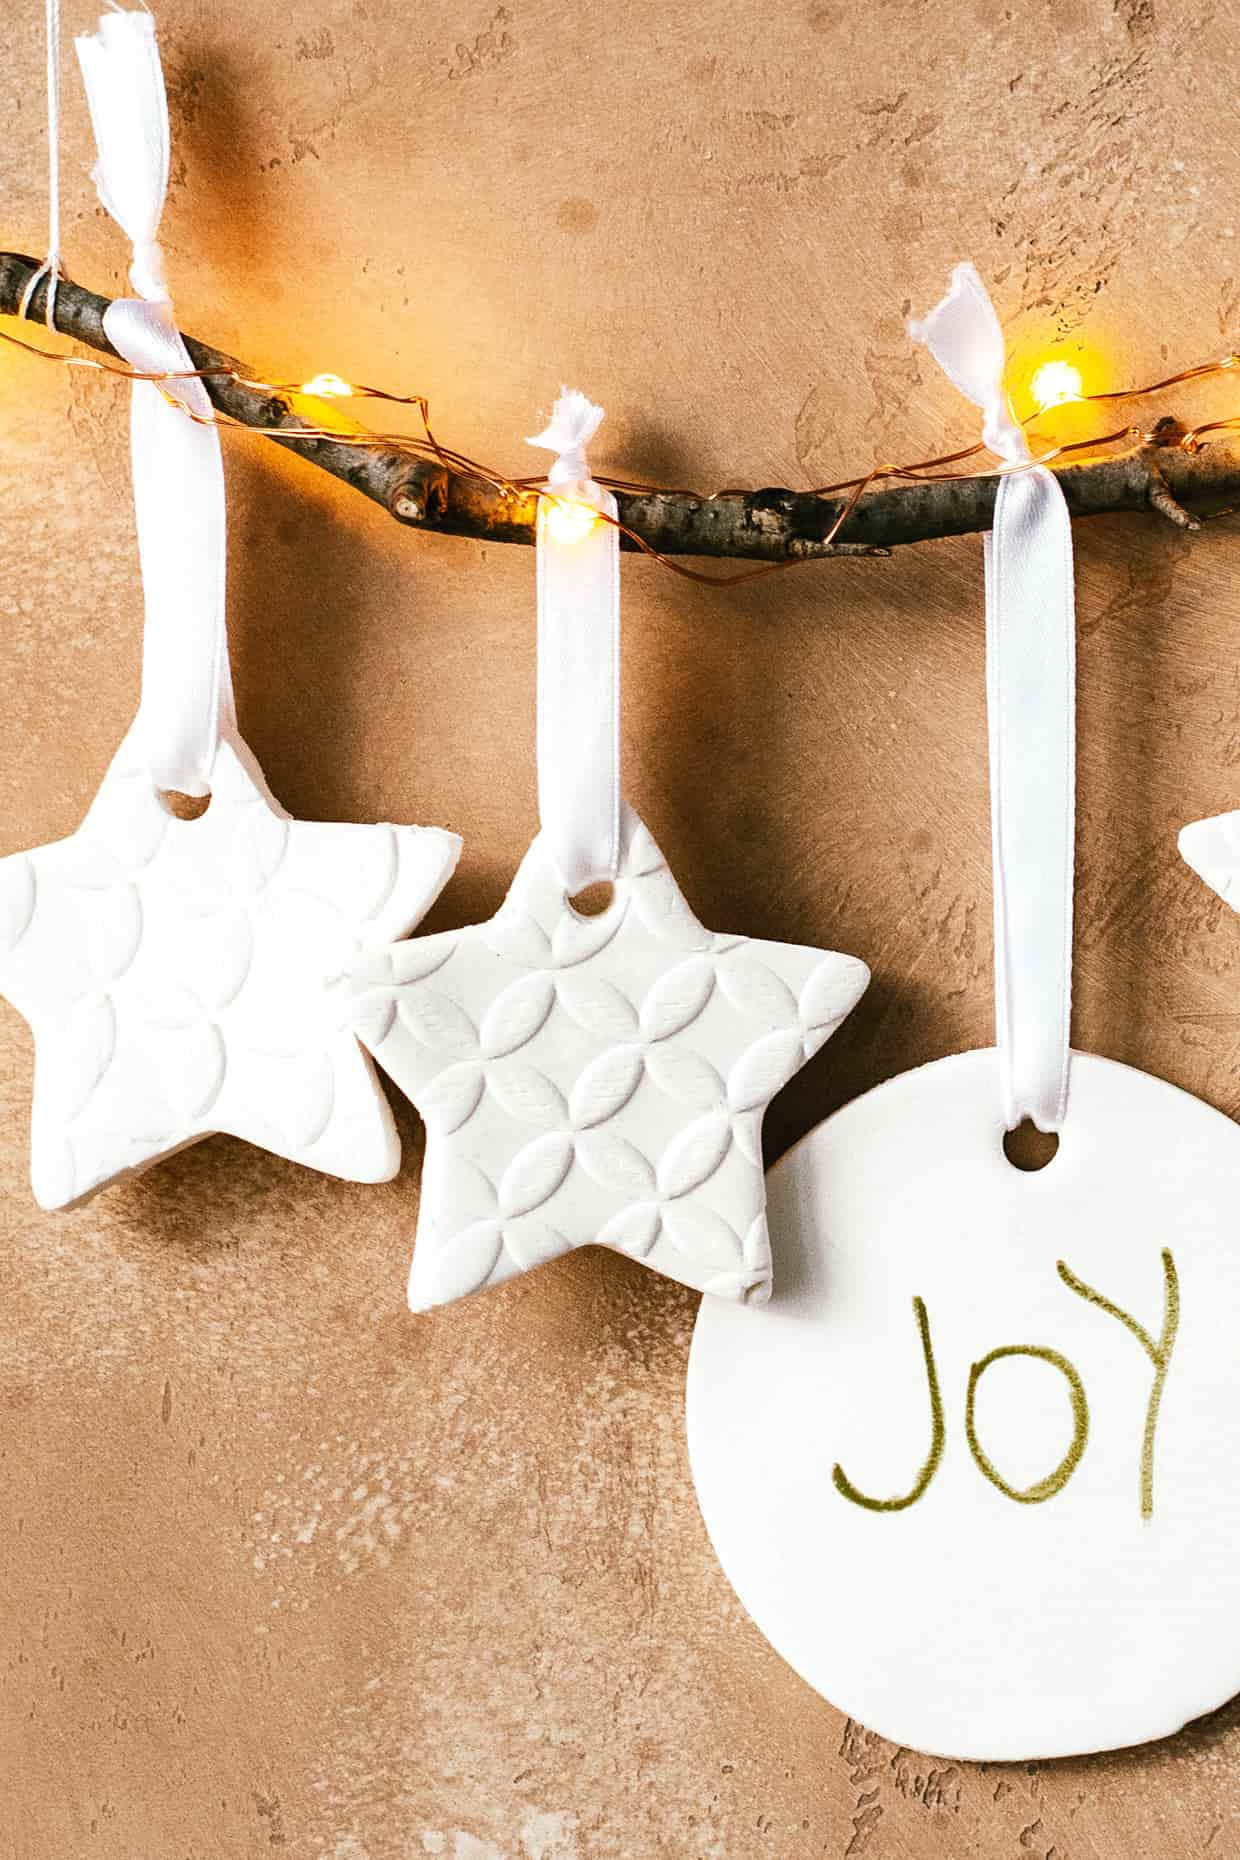
- Add ribbons: You can tie colorful ribbons through the holes, to make the ornaments more colorful.
- Make a garland: You can make a full ornament garland or just add some ornaments to an existing garland to make it look new again.
- Make gift tags: You can make gift tags with homemade Christmas ornaments. They look special and personal and you can make a unique one for each person.
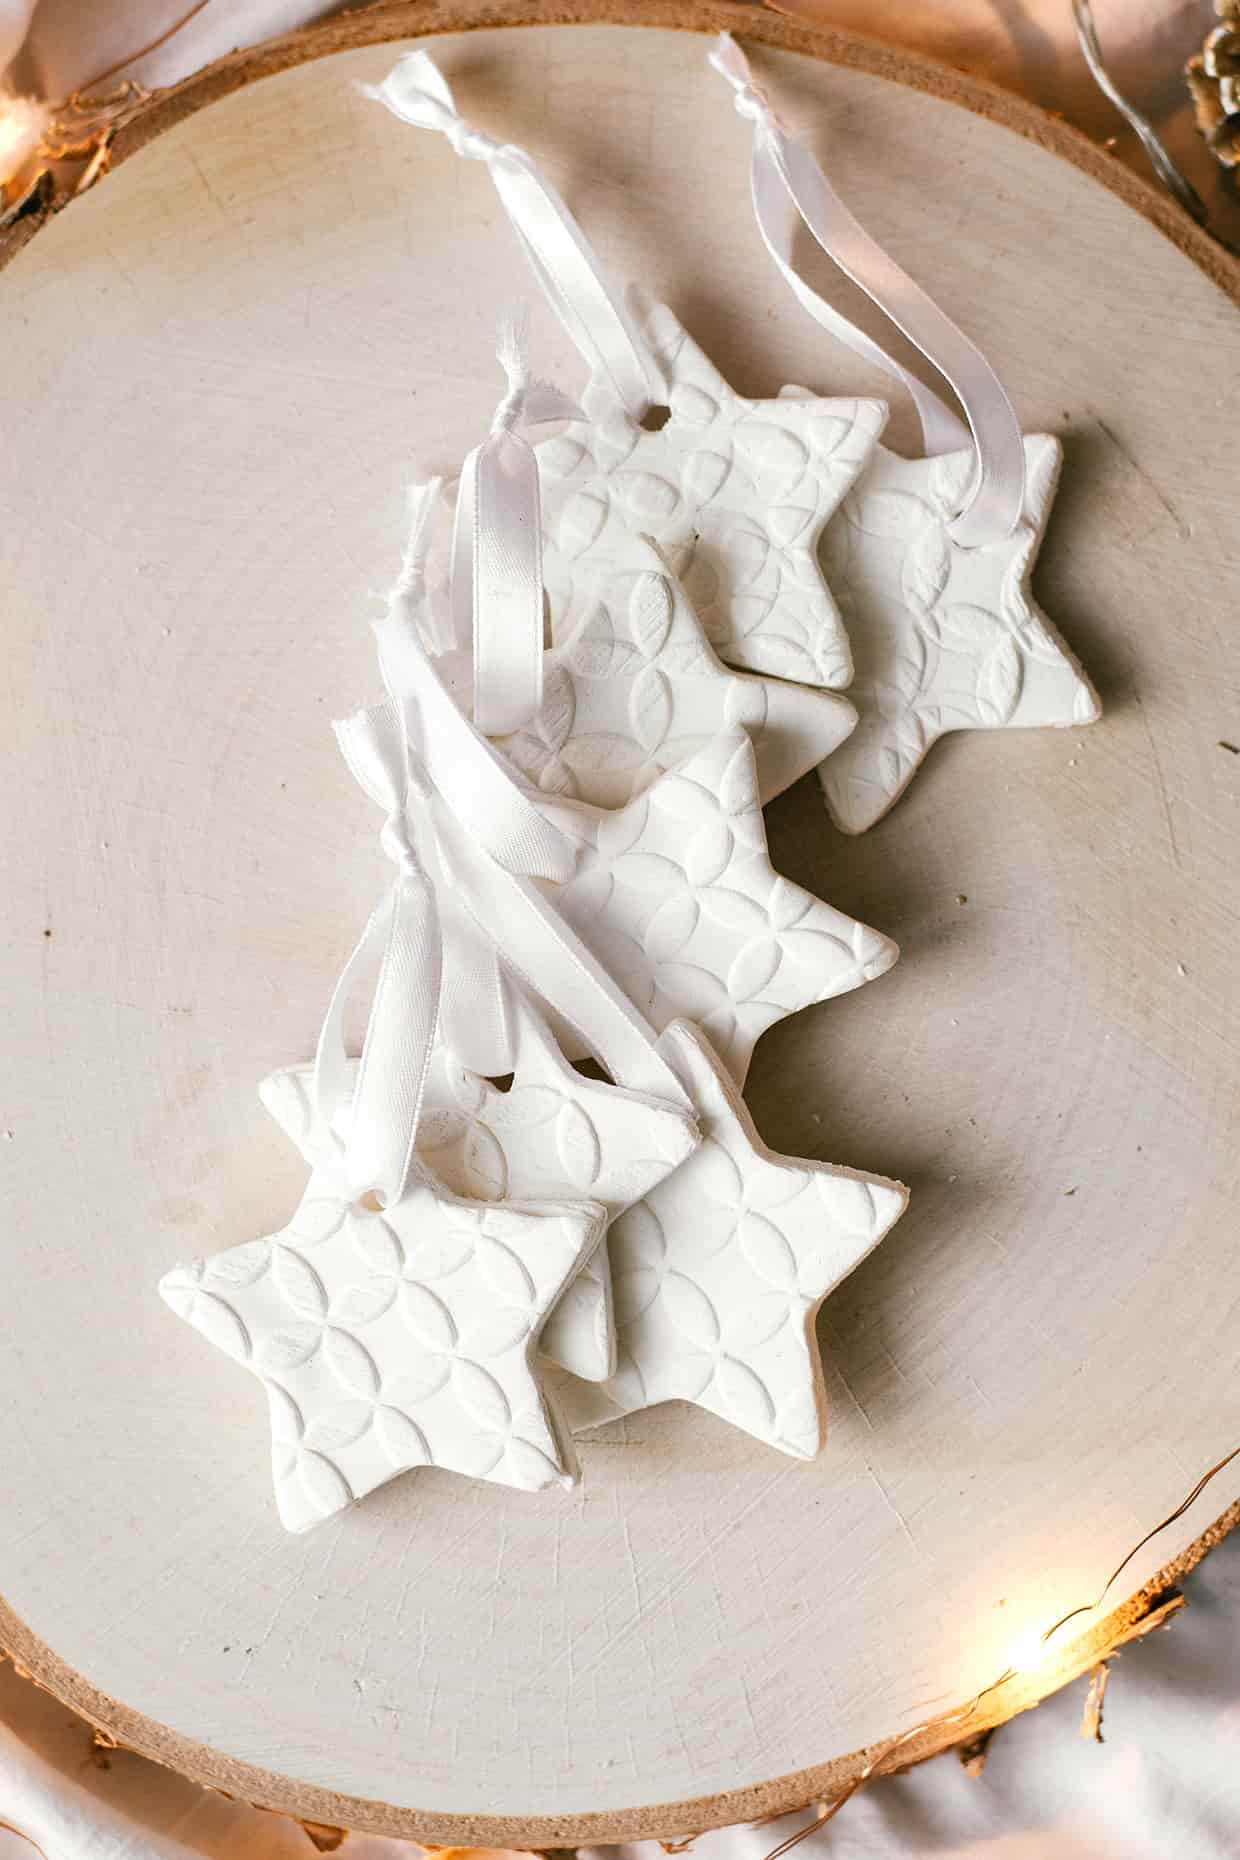
How to store
Store your scented baking soda ornaments in an airtight container, layered between sheets of paper towels or parchment paper. They stay perfect like that and last for several years. They aren’t indestructible, so be gentle with them, but they do hold up really well.
More easy recipes for the holiday season
- Cinnamon roasted almonds (The best festive snack in the world. So easy and so tasty.)
- Orange sugar scrub with cinnamon (An affordable and cute gift idea.)
- Salt dough ornaments
Recipe
Homemade scented baking soda ornaments
Ingredients
- 1 cup baking soda
- 1/2 cup cornstarch more for kneading
- 3/4 cups water
- 1 bottle essential oil orange, lemon or cinnamon
Instructions
- Make the mixture: Mix baking soda and cornstarch in a small saucepan. Add water and whisk until soda and starch are dissolved and the mixture is smooth. Add 5-10 drops of essential oil.
- Cook over medium heat, stirring constantly, for about 5 minutes or until thickened. As you stir, scrape the bottom and sides of the bowl as well. The mixture will first get bubbly before it gets thicker.
- Once the mixture is thick like toothpaste, remove it from the stove. Transfer dough to a cool plate or glass bowl and allow it to cool to room temperature (about 30 minutes). Cover it with a damp cloth to prevent it from drying out, if you're leaving it for longer.
- Place dough on your work surface. Dust it with cornstarch and knead the dough into a smooth ball. If it’s sticky or too wet add more cornstarch, tablespoon by tablespoon and keep kneading until it’s less sticky. It should be pliable, but not sticky wet nor dry and crumbly. (It will break if it's too dry.)
- Add more cornstarch to your work surface and roll out the dough to 1/4 inch (6mm) thick. Use a normal rolling pin for rolling. Only use a patterned rolling pin for a final decorative roll-out, if using.
- Cut out desired shapes and transfer them to a baking sheet lined with parchment paper. Cut out holes (for hanging the ornaments) with a straw. Let ornaments air-dry overnight. Flip them over the next day and let them dry until they’re completely set, ideally another day. The longer you wait the better.


Alice these are gorgeous!! <3 I've been looking for plain white, pretty decorations for our tree and these are perfect. I definitely have to give them a go!
Thank you, Libby! 🙂
Does the corn starch need to be “fresh”?
Hi Joan, I’m assuming you mean fresh in terms of its “best before” date? In that case you can use expired cornstarch, if it otherwise looks fine, as you won’t be eating it anyway.
Hope this answers your question!
If not, do let me know. 🙂
Hi, I really like the idea and looks of your ornaments! How many can you get from one batch of dough?
Hi Hannah, thank you!
I’d say you get about 15 ornaments, depends on the size of cut outs.
Hi Alice,
I want to make them for others. My question is that does it last forever? With time will it crumble?
Also does it break easily?
I want to use this instead of air dry clay from the art shop.
Thank you in advance! ?
These are beautiful. I want to try them for my class. Have you ever painted them and if so what kind of paint would you recommend for first graders. Happy holidays
Hi Naomi, thank you! I actually haven’t, but if I would I’d probably try acrylic paints, because they’re a bit thicker and normally really pigmented. Just make sure the ornaments are dry before you paint them.
Happy holidays to you and your students! 🙂
Thank you so much 🙂 I am making the white ones for my home and so far they smell amazing. My class will paint the ones they take home.
So happy you’re liking these!
And I hope your kids have a lot of fun painting them, such a thoughtful activity + gift for them 🙂
Can left over dough be stored?
Hi Christi,
do you mean overnight or for a longer period?
I think it would hold up overnight if wrapped well, but I’m not sure about longer storage.
Hello! Thank you for a wonderful activity! I am SO thankful you have the option right on the ingredients list to 2x/3x !! Thank you, thank you!!
Hi Star, so happy you find that helpful! I think it’s a wonderful feature too 🙂
Do you know if you use the essential oils and paint the ornaments does the paint affect the smell?
Hi Tara, while I haven’t tried this myself, I do think the paint might cover up some, if not all of the fragrance? I guess it depends on the paint? I’d definitely use more essential oil, if you plan on painting the ornaments, just to try and keep some of the scent. You can also try making a small trial batch to test out if adding more oil helps. I’d also use water based paints, they’re generally less smelly.
Hope this helps in any way,
I’m sorry I can’t think of anything else!
Hi Alice,
Sorry, my phone was acting up…I accidentally posted this as a reply to another comment and my name became a smiley ??
I want to make them for others. My question is that does it last forever? With time will it crumble?
Also does it break easily?
I want to use this instead of air dry clay from the art shop.
Thank you in advance! ?
Hi Diana,
no worries 🙂
I’ve had mine for a few years now, saved in an airtight container and they’ve held up well. I wouldn’t say they can last forever. They are sturdy and won’t crumble (unless you drop an ornament on the floor, then it can break), but I think clay is more long lasting. You can seal the clay, give it a nice glossy finish and it’ll keep for way longer I think.
So I guess you can make these for gifts and with some proper care they can last for years, but there’s no guarantee they’ll last forever.
Hope this helps 🙂
Can I bake these on low heat to speed up drying time?
Hi Tonya, yes you can!
Just set your oven really low, about 175F (80C) and periodically check on the ornaments. Also don’t forget to turn them after about 40 minutes. And when another 30-40 minutes pass, you can flip them again and let them bake some more. How much time you need will depend on the size of each ornament, so just keep an eye on them (thicker larger need more time than small ones). In the end, you can also just let them dry in a turned off oven.
Hope this helps 🙂
Hi thankyou for the video it is very nicely done. I am using my patterned rolling pin for the first time. So all round a new experience. Thank you.
That’s so great Paulette, happy to see you enjoy the tutorial. Thank you for sharing!
Hi, if we don’t have essential oils, will it affect the dough in any way? (other than the absent scent of course! :D) Like I mean would I need to add some other oil as replacement or something? Thank you!
Hi Hiba,
no, not at all. You don’t have to add anything, just leave the oils out and that’s that. 🙂
I have made this craft, and added chopped rose petals and rose fragrance oil in the kneading process. Then I pushed the wet scented dough (heart cutouts) into the front of a medium sized wicker basket. After 10 years, they are still there. I did not use any Modge Podge to seal them.
I have also added powdered cinnamon (a small amount) to the 1st stage of this clay, then added a tiny amount of cinnamon oil at the kneading stage. I cut them out in Christmas ornaments, and after they dried, I strung them, alternating 3 sticks of cinnamon tied with twine and a small flower glued in the middle, then an ornament, etc. One could alternate dried orange slices and cinnamon, or apple slices and cinnamon. They are perfectly lovely, hung in the windows, with a small set of white blinky lights. And, the room they are hung in smells divine, too.
Such incredible ideas, Patty, thank you for sharing! 🙂
Where did you get that rolling pin? I love that pattern!
And what a great project!
Thank you Tracy!
I got it at a local store years ago. 🙂
I love these! We made some last night and did everything exactly as you said. However, ours are cracking… even just the simple circle ones! Do you have any thoughts about this?
Thanks
Hi Katelyn,
are you air drying them?
If you are, the one thing I can think of is that you rolled out the dough too thin and the ornaments are breaking because of that. The only time I’ve ever had an ornament break is when I rolled it too thinly so upon picking it up it cracked on one side.
We did air dry them, and they were rolled out to 1/4” thick! Do you have higher humidity maybe? I’m in northern Utah and it’s very dry here. That’s the only thing I can think it might be!
Hmmm, humidity could be it. Although the air in my home is on the drier side right now and it’s never particularly humid anyway.
Did all of them crack? Because you could be right. If the air is so dry it’s drying them really fast on the outside, but they’re still damp and soft on the inside that could be the issue. Maybe they needed more time to rest?
If you decide to make more, try putting them on a baking sheet and in the oven (turned off and cool). You can leave it partially open, but since it’s a small space, the environment would still be more humid. You can even close it overnight, then open again in the morning as you flip the ornaments.
I wish I could be of more help and I am very sorry this happened to you. Air drying is the slow, safe option, so cracking shouldn’t happen (yet it did). :/
I DO NOT recommend this recipe. Salt dough works much better. This dough would crack when I put the straw in for the hole. It was nice and playable but extremely difficult to work with and very time consuming.
I had the same problem. My daughter was so sad to see all of her ornaments cracked this morning.
Hi Kristin,
I’m so sorry to see your ornaments cracked. I’ve never had this problem, especially not with air drying.
I’m testing out a few different things and will update this post in the future, but possible reasons for cracking would be: not drying ornaments slow enough, not rolling the dough thin enough, overcooking the dough.
Hi Cheryl,
you have to put the straw into raw dough.
If it cracked upon you doing that, my guess is that your dough was far too dry. Humidity always plays a part and while the dough shouldn’t be sticky, it also shouldn’t be dry.
Sorry it didn’t work as well for you as it does for so many others.
Cracking is due to over-handling / over-kneading the dough, according to Clabbergirl website. (Brand of cornstarch). Don’t work the dough / handle the dough any more than absolutely necessary. It ight be fun to knead and play with it – but don’t do that. And if using scraps of dough from previously cut ornaments, those might be especially prone to cracking since they’re being worked twice.
Could you add food coloring to the dough for color instead of paint? If so would you add it in the beginning or knead it in the finished dough?
Good idea, Nancy!
Yes, you should add it in the beginning. Mix the food coloring with water, before adding the starch.
Hope this helps 🙂
Made these with my 2 toddlers and they loved making the ornaments. we used acrylic pain. just an fyi make sure they are in clothes or an apron you care nothing about. lol mine were messy and having a blast.
Love that, Lyndsey! So happy you had fun 🙂