
Making homemade pumpkin puree is surprisingly simple. Use a variety of winter squash and pumpkins and follow this recipe to learn how to make pumpkin puree from scratch. You can use your fresh pumpkin puree in baking recipes, for quick dinners or even as a treat for your dog or cat. You can also freeze it for later.
Finding canned pumpkin puree isn’t a simple task in Slovenia. It’s either easily available (although mostly online – somewhere in Europe) or sold out everywhere and this year is one of those years. But I am the boss of my own life, so I won’t cry for canned pumpkin. Instead, I am making my own pumpkin puree. And now I’m giving you my easy recipe so you can see how to make fresh pumpkin puree too.
Pumpkin varieties
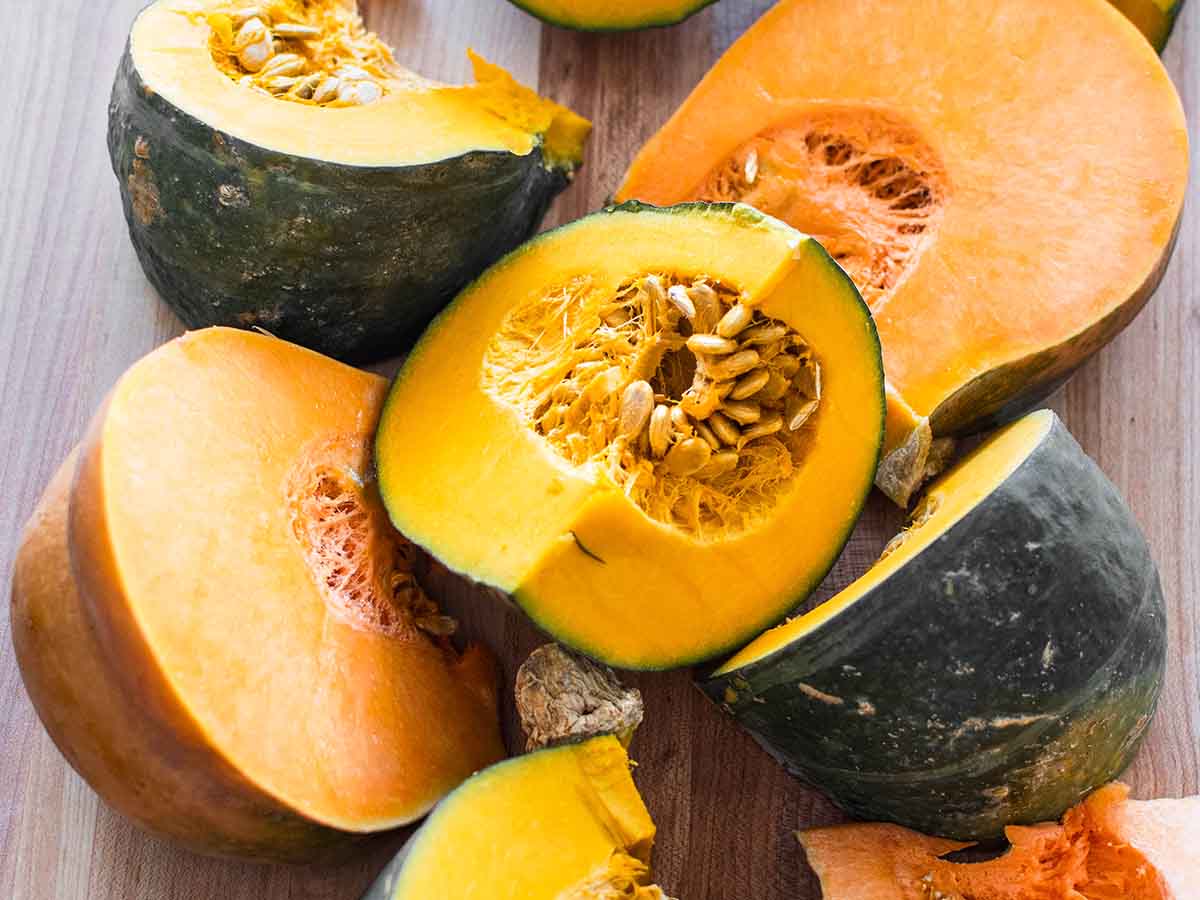
The base of this recipe and the only ingredient you need is a pumpkin. You can use any variety you like (here’s a short list with types of pumpkins), but ideally you want a pie pumpkin or sugar pumpkin. These are sweet varieties, great for baking and cooking. Avoid carving pumpkins aka Halloween pumpkins, which are decorative and not necessarily very tasty.
The most easily available pumpkin varieties where I live are: Butternut squash, Kabocha squash (also known as Hokkaido squash) and Musquee de Provence. The latter is a French variety of pumpkin, also called a Fairytale pumpkin, because it is so picture perfect.
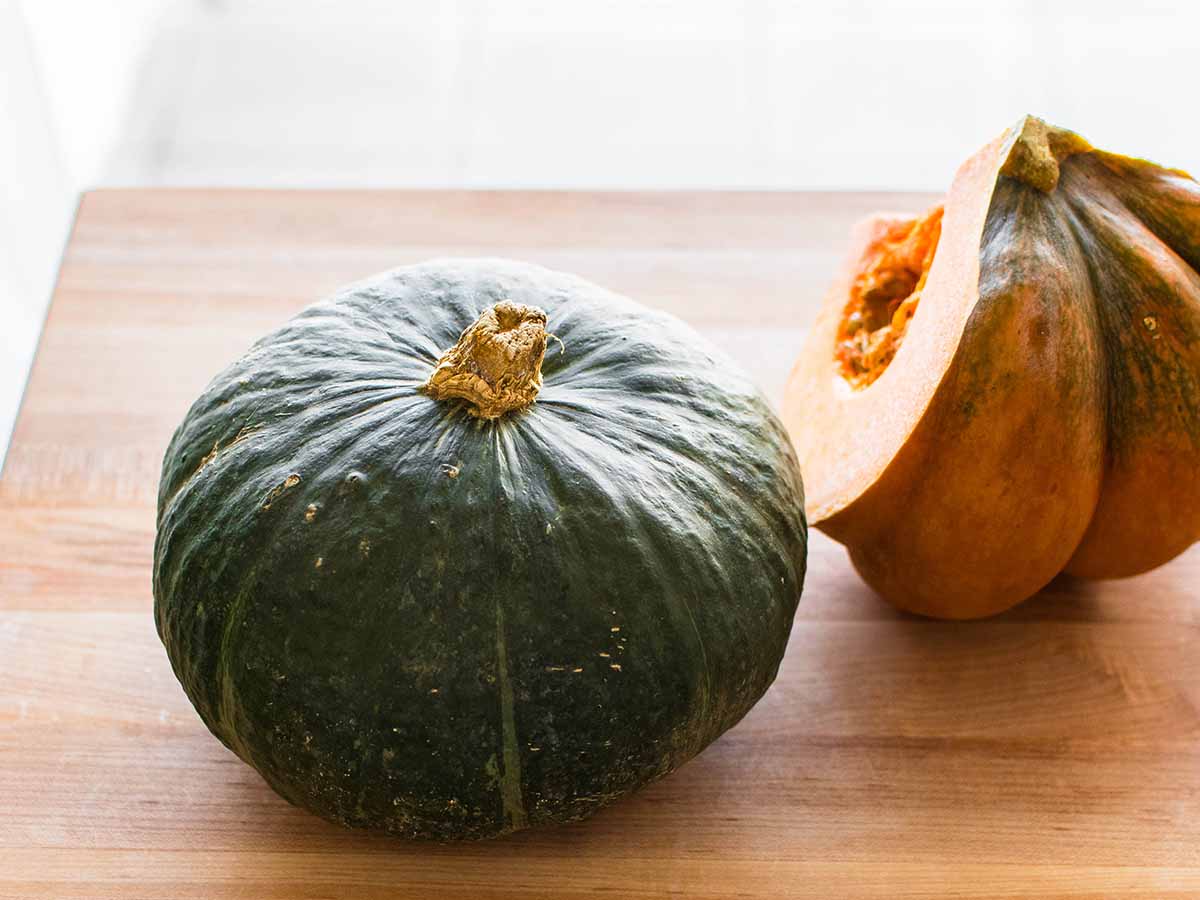
To make homemade pumpkin or squash puree, I like to use the Musquee de Provence pumpkin. Often in combination with a green Kabocha squash. I like both because their color is deep, especially when baked. They’re also both very sweet and make the most beautiful, creamiest puree.
How to make puree
You can make fresh pumpkin puree without an oven, with a peeled and cubed pumpkin that you cook or steam on the stove. But by far the easiest way of making pumpkin puree, and what this recipe calls for, is to bake a pumpkin.
Peeling a raw squash can be quite tedious and you don’t have to do that with baking. I also think letting the squash roast slowly develops the sweet flavor even more, which results in a more flavorful baked pumpkin puree.
First wash and dry your pumpkin. If it’s a small squash, you can cut it in half with a large knife. I find cutting it into quarters easier, sometimes I’ll halve those too. Always cut around the stem and not through it, as the stems are too tough.
Scrape out the seeds and the stringy pulp. I usually discard the seeds (we collect bio-waste separately, so they’re still used / recycled), but you can pick them out to make roasted pumpkin seeds if you wish.

Lay the pumpkin wedges on a lined baking sheet. Bake the pumpkin for 50-60 minutes, until you can easily pierce it with a knife or fork on various parts of each slice. If in doubt, it’s better to bake longer than not long enough.

A well baked pumpkin should almost collapse under its own weight and you’ll see the flesh pulling from the skin. Remove the baked pumpkin from the oven and allow it to cool.

Once cool enough to handle, pull away the skin and scrape the flesh into a bowl. While this is a messy process, it shouldn’t be hard as the soft skin should peel easily.

If you have a small food processor or a large pumpkin, puree pumpkin in batches. Otherwise transfer all the pumpkin flesh in your food processor and blend on medium-high speed for about 5 minutes until the puree is very smooth and fluffy.

Usually a pumpkin will contain too much water, so transfer the puree to a fine mesh strainer set above a bowl (or a measuring jug). Let it sit like that for about 30 minutes. You can also strain it with a cheesecloth or a cotton kitchen towel.

If you got lucky and your squash is on the dry side and the puree isn’t smooth, because it’s so dry, then add some water to it and blend until you get the desired consistency.
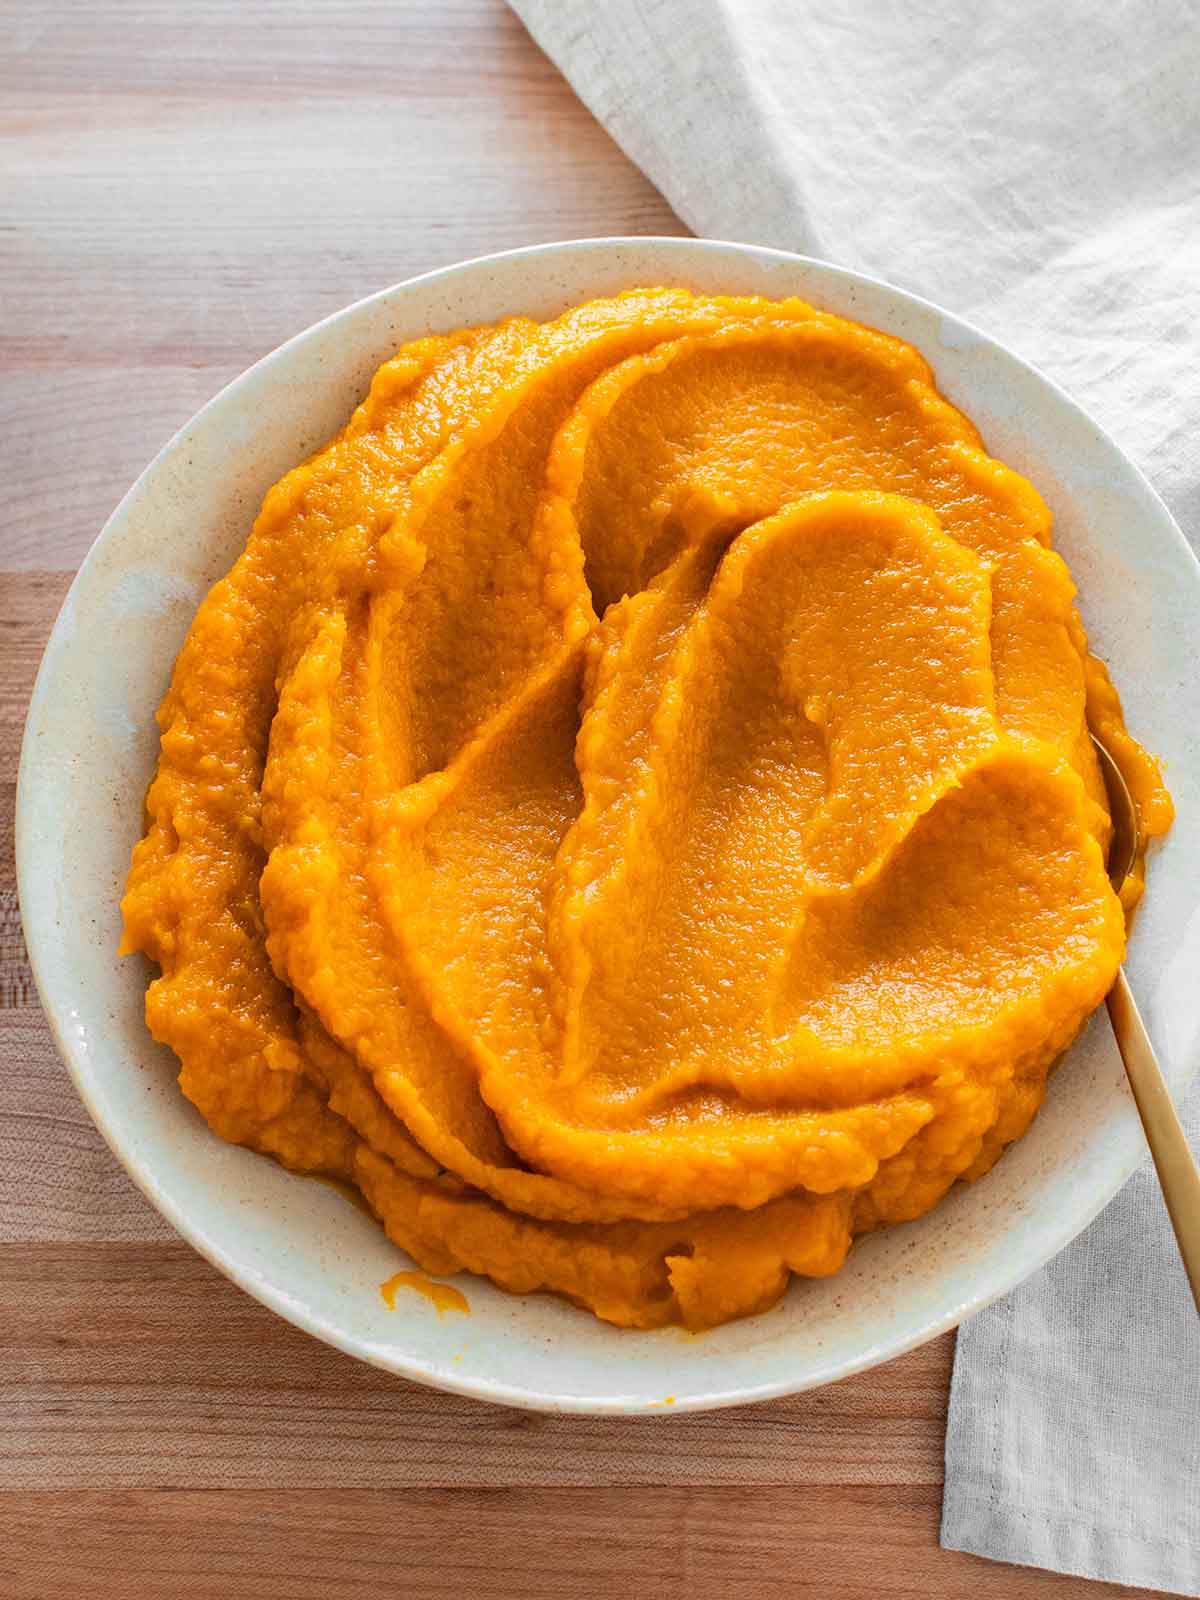
At this point, your homemade pumpkin puree is ready to be used.


How to store
Refrigerate fresh pumpkin puree in airtight containers or jars for up to 4 days. I like to make pumpkin puree last longer, so I usually freeze most of it in small portions.
How to freeze
To use in cooking or baking recipes, I measure out one-cup servings. I use small freezer bags and put 1 cup (240 ml) puree in each one. I then pack all one-cup serving bags into one large bag, to prevent any possible freezer burn.
If you are a pet parent (as am I, hi!) you can also use homemade pumpkin puree for dogs or cats. To use small amounts at once, freeze puree in an ice tray. Once it’s frozen, transfer all the pumpkin puree cubes into one larger bag or container. It makes taking out mini portions so easy and they thaw fast too.
Frozen pumpkin puree keeps for up to 6 months.

How to thaw
The easiest and safest way to thaw pumpkin puree is by putting it in the refrigerator overnight. It takes a while, but you get puree that looks perfect every time.
If you’re in a hurry, you can also thaw it in your microwave. Mine has a Defrost setting, so thawing anything is pretty easy. All I have to do is set the weight and let the microwave do its magic.
You can use frozen pumpkin puree the same way you would fresh. Freezing doesn’t affect the flavor or texture of puree. And if it looks too watery to you, first mix thawed puree well with a spoon. Then you can always squeeze some water out, if it’s still too watery. Place the puree in a cheesecloth or clean kitchen towel, twist it at the top and squeeze out the excess water.

You can use homemade pumpkin puree for pie or in any recipe that calls for canned pumpkin puree. It tastes just as good, if not better and it’s always available. The latter is very important to me.
Recipes to make with pumpkin puree
- Cinnamon swirl pumpkin brioche (Soft pillowy brioche bread with swirls of brown sugar and cinnamon, it’s the perfect Fall baking recipe.)
- Quick pumpkin pasta with walnuts (This is a great weeknight meal with a creamy pumpkin puree sauce.)
- Sweet potato smoothie (Obviously, use pumpkin puree instead of sweet potato puree. It’s a great way to eat more vegetables in smoothies.)


Recipe
Homemade pumpkin puree
Ingredients
- 1 medium baking pumpkin around 2.5 kg or 5 pounds
- 1 teaspoon salt optional
Instructions
- Heat your oven to 400°F (200°C) and line a baking sheet with parchment paper.
- Rinse and scrub your pumpkin, then pat it dry. Cut the squash into quarters, starting at the stem and cutting through to the bottom. Then pull out each piece. (Don’t attempt to cut through the stem as it’s too dry and tough.)
- Scoop out the seeds and stringy pulp with a spoon. If the quarters are very big, cut the pieces even smaller.
- Place sliced pumpkin on your baking sheet (and sprinkle with salt if you want) and bake for 50-60 minutes or until the pumpkin is easily pierced with a knife in several places. You want to see the pumpkin collapse a bit under its own weight and for the flesh to pull away from the skin easily.
- Allow the pumpkin to cool until you can safely handle it. Scoop out the flesh and transfer it to a food processor. (If your food processor is smaller or the pumpkin is very big, you might have to do this in batches.)
- Process the pumpkin on medium-high speed until it’s very smooth, about 5 minutes.
- Store fresh pumpkin puree in the refrigerator for up to 4 days. Or prepare one-cup servings in bags and freeze them for up to 6 months.


This worked beautifully for my Muskee de Provence I grew this year!
First time gardener, this is a game changer. Far better than canned pumpkin.
I also got about a quart of pumpkin juice (liquid strained off) that is bright orange so I assume is filled with flavor and nutrients! I’m excited to use my Coctail De Muskee in creative ways.
So happy you found the recipe useful, Carolyn! 🙂